
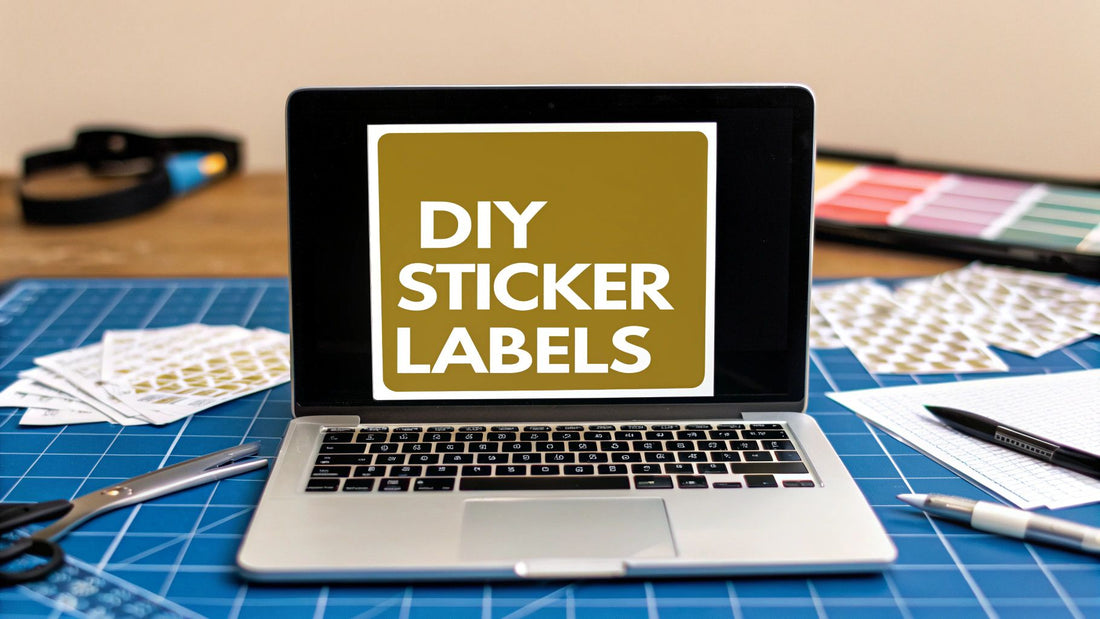
Create Your Own Sticker Labels From Scratch
So, you have a killer idea for a sticker and you're ready to bring it to life? Awesome. The best way I've found to create your own sticker labels is to nail down your purpose first, then jump into a design tool like Canva or Adobe Illustrator. Finishing it off with a durable material like vinyl is the secret sauce for that pro look. This simple approach has never failed me, and it ensures the final sticker isn't just cool to look at, but actually holds up.
From Idea to Incredible Custom Stickers

Think of this as your personal roadmap for the whole sticker-making adventure. It doesn't matter if you're a small business owner looking to brand your packaging, a crafter adding some personality to your projects, or someone planning unforgettable event favors. We're going to skip the technical fluff and get right to the good stuff—practical advice that actually works.
Consider me your co-pilot on this creative flight. We'll walk through everything from brainstorming designs that pop to picking the perfect materials and navigating the printing process like you've been doing it for years.
What to Expect on Your Sticker Journey
Why settle for boring, off-the-shelf labels when you can create something that screams you? Before you even think about opening a design app, it helps to have a game plan. Getting a handle on understanding the full product development process can be a huge help here, giving you a solid framework for your project.
Here’s a sneak peek at what we'll cover to make sure you succeed:
- Brainstorming and Planning: We'll figure out your sticker's main job, who it's for, and the perfect size.
- Design Fundamentals: It's all about using color, fonts, and layout to create a label that looks amazing and gets its message across.
- Material and Finish Selection: Should you go with vinyl or paper? Matte or glossy? We’ll find the right combo for your needs.
- Printing and Production: The classic dilemma—print them yourself at home or send them off to a professional? Let's weigh the options.
The real goal here isn't just to make a sticker. It's to create a tiny piece of art that tells a story about you or your brand. Every little choice you make adds to that final narrative.
By the time we're done, you'll be able to take that fuzzy idea in your head and turn it into a stack of high-quality, custom stickers you can actually hold. If you want to see what's out there and get some inspiration, take a look at the incredible custom stickers over at https://everone.shop/collections/stickers.
Planning Your Perfect Sticker Project

Before you jump into the fun part—the design—let's pump the brakes for just a second. I know you're excited, but a little bit of thinking upfront can save you a world of frustration later on. Getting this initial planning right is what separates an okay sticker from a perfect one. This is where you lay the groundwork to create your own sticker labels that really work.
Think of it like being a detective. Your first clue to solve is figuring out your sticker's true purpose. What job does it actually need to do? The answer to that question will steer every other decision you make.
What's Your Sticker's Mission?
Is this sticker going to live on a rugged water bottle that gets tossed in a gym bag and blasted in the dishwasher? Or is it meant to be a delicate, beautiful seal for your handmade soap packaging? Those two scenarios are worlds apart and demand completely different materials, adhesives, and finishes.
To get to the bottom of it, ask yourself a few key questions:
- Where will it live? Is it an indoor sticker for a journal, or is it going on a car bumper to face down sun, rain, and snow?
- What will it stick to? A smooth glass jar is one thing, but a textured paper bag or a flexible piece of clothing is another.
- What’s the main goal? Are you trying to build your brand, add a decorative touch, provide important information, or maybe all three?
Figuring this out first helps you make smart, effective choices down the line. For example, a sticker for a coffee mug absolutely needs to be waterproof and heat-resistant. On the other hand, a label for a gift box you know will be thrown away can be a much simpler, more affordable paper stock.
Getting the Size and Shape Just Right
Once you know your sticker's mission, it's time to think about its physical footprint. The right size and shape can make or break your design. A label that’s way too big will completely overwhelm a small product, but one that’s too tiny might just disappear.
Here’s a pro tip: grab a ruler. Measure the surface where your sticker is going to go. Then, cut out a little piece of paper to that exact size and stick it on the item. This simple trick lets you see and feel how it will look in the real world and helps you dodge any awkward sizing mistakes.
Don't just eyeball the size. I’ve seen it go wrong too many times. A five-minute test with a paper cutout can be the difference between a label that looks perfectly balanced and one that just feels… off.
This practical step helps you nail down your vision before you even think about opening a design program. There's a reason the global sticker market is projected to hit an incredible $7.67 billion by 2033—businesses and creators are catching on to how powerful these little branding tools can be. You can dive into the market trends to see just how much they're growing in popularity.
Ultimately, this whole planning stage is about bridging the gap between your idea and reality. By defining the purpose, understanding the environment, and locking in the dimensions, you’re setting yourself up for a design process that isn't just creative, but perfectly suited to your goals.
Designing Labels That Tell a Story

Okay, this is where the magic happens. Now that you've got your strategy sorted out, it's time to bring your vision to life with a design that really pops. How you create your own sticker labels visually is just as crucial as the paper you print them on. You're creating a tiny piece of art that needs to grab attention and forge an instant connection.
The good news? You don't need a fancy art degree to make something amazing. You just need the right tools for the job.
Finding Your Perfect Design Software
Think of your design software as your digital workshop. Picking the right one from the start will make the whole process smoother and a lot more fun.
- For Beginners and Quick Projects: Honestly, you can't go wrong with Canva. It's a total game-changer for anyone who doesn't live and breathe graphic design. With thousands of templates and intuitive drag-and-drop tools, you can knock out a professional-looking design in no time.
- For the Pros and Ultimate Control: If you’re a designer or just want total creative freedom, Adobe Illustrator is the industry gold standard. It’s a vector-based program, which means you can scale your design to any size—from a tiny lip balm label to a massive banner—and it will stay perfectly crisp.
My advice? Think about your comfort level. For most sticker projects, a user-friendly tool like Canva has more than enough firepower. Just pick one and start playing around.
Core Principles of Standout Sticker Design
Having a great tool is one thing, but knowing a few design fundamentals is what will take your sticker from "nice" to "I need one of those!"
First up, color. Color is emotional. It speaks a language all its own. Warm tones like red and orange shout energy and excitement, while cooler shades of blue and green feel more calm and dependable. What feeling do you want to evoke? Choose a color palette that tells that story.
Next is typography. The fonts you pick say so much about your brand. A whimsical, handwritten script might be perfect for an artisan jam, while a clean, modern sans-serif font conveys a sense of sleek professionalism. Just make sure it's crystal clear and easy to read, even from a distance.
Your sticker is a tiny storyteller. Every element—from the colors and fonts to the empty space around your graphics—contributes to the narrative. Make every choice intentional to ensure it's telling the story you want.
If you really want to level up, think beyond just looks. To make your labels truly resonate, you need to learn how to master visual storytelling techniques so your designs connect on a deeper level.
Getting Technical Without the Headache
Alright, let's quickly cover a couple of technical details. I know it sounds boring, but getting this right ensures your design looks as good in your hand as it does on your screen.
When you're ready to save your file, you'll see a few options. PNG is often a great choice for stickers because it allows for a transparent background—perfect if your sticker isn't a standard circle or square. If you created a vector in Illustrator, save it as an SVG or PDF to keep it flawless.
Finally, let's talk color mode. Your computer screen displays color in RGB (Red, Green, Blue), but professional printers use CMYK (Cyan, Magenta, Yellow, Black). Always set your design file to CMYK from the start. This one small step will save you from any nasty surprises with off-looking colors when your stickers arrive.
If you want a deeper dive into the technical setup, our complete guide on https://everone.shop/blogs/news/how-to-create-custom-labels walks you through everything.
Choosing the Right Materials and Finishes
You’ve nailed the design, and it looks fantastic on screen. Now for the fun part: bringing it to life. The material you choose is the very foundation of your sticker, defining how it looks, feels, and stands up to the real world. This is where you can create your own sticker labels that either fade into the background or make a lasting impression.
Think about where this sticker will end up. Is it for a jar of homemade jam destined for a cozy pantry shelf? An uncoated paper stock would be a great fit, giving it a natural, organic feel. But what if it’s going on a water bottle, a laptop, or the back of a car? That sticker needs to be tough enough to handle daily scuffs, spills, and sunshine.

This little chart breaks down the thought process perfectly: figure out the use, pick your material, and then choose a finish that makes your design sing. Following this path ensures you get a sticker that’s not just pretty, but perfectly suited for its job.
The Great Debate: Vinyl vs. Paper
For most projects, you'll be deciding between two main players: vinyl and paper. Each has its own strengths, and the best choice really boils down to your specific needs.
- Durable Vinyl: This is your workhorse. If your sticker needs to be waterproof, weatherproof, or scratch-resistant, vinyl is the answer. It’s a type of plastic, so it’s incredibly resilient. Think car bumpers, outdoor gear, and anything that might take a beating.
- Classic Paper: I love paper stickers for their classic, tactile feel. They're more affordable and are absolutely perfect for indoor uses like product packaging, planner decorating, or sealing envelopes where extreme durability isn't the top priority.
There’s a reason vinyl and other plastics dominate the packaging labels market. That market was valued at around USD 53.92 billion and is expected to hit USD 70.02 billion by 2030. According to Grand View Research, plastics are the fastest-growing segment because they’re just so versatile.
Sticker Material and Finish Comparison
Navigating the options can feel a bit overwhelming, so I've put together this quick comparison table to help you match the right material and finish to your project. It's a handy cheat sheet for weighing durability against the final look and feel.
| Material/Finish | Best For | Durability | Look & Feel |
|---|---|---|---|
| Glossy Vinyl | Outdoor use, water bottles, products needing a pop | Very High (5+ years) | Vibrant, shiny, eye-catching |
| Matte Vinyl | Laptops, sophisticated branding, tech accessories | Very High (5+ years) | Smooth, non-glare, modern, elegant |
| Paper | Indoor packaging, envelopes, short-term promotions | Low to Medium | Natural, classic, cost-effective |
| Holographic | Special editions, art stickers, grabbing attention | High | Iridescent, rainbow-like, dynamic |
| Transparent | Windows, jars, designs that need to blend with a surface | High | See-through, clean, "no-label" look |
Ultimately, your choice here sets the entire tone for your product or brand. A little forethought goes a long way in creating a sticker that people will love.
Elevating Your Look With Finishes
The finish is the final touch that can take your sticker from good to great. It’s a thin laminate applied over the printed design that adds a layer of protection and has a huge impact on the final look.
Think of the finish as the sticker's personality. A glossy finish shouts for attention with its vibrant shine, while a matte finish offers a more subtle, sophisticated elegance. Your choice here sets the entire mood.
Let's break down the most popular options:
- Glossy: This high-shine finish makes colors pop and gives your sticker a premium, reflective look. It's my go-to for making a bold statement.
- Matte: With its smooth, non-glare surface, a matte finish has an understated, modern feel. It’s fantastic for sophisticated branding and is really easy on the eyes.
- Holographic: This one is a showstopper. It creates a stunning rainbow effect that shifts with light and movement, guaranteeing your sticker will get noticed.
- Transparent: This is perfect for when you want your design to look like it’s printed directly on a surface, like a glass jar or a shop window.
By carefully matching your material and finish to your design's purpose, you create a sticker that’s not just beautiful but also built to last. For those projects with truly unique shapes and outlines, you might find that our custom die-cut stickers are exactly what you need.
Printing Your Stickers: At Home or With a Pro?
Alright, your design is finished and looking sharp. Now for the exciting part—turning that digital file into a real, hold-it-in-your-hand sticker. This is where the magic happens.
You've got two main roads you can go down here: the hands-on, DIY route of printing them yourself, or handing it off to the pros for a polished, professional finish.
Honestly, there’s no right or wrong answer. The best choice really boils down to your budget, how many stickers you need, and what kind of quality you're aiming for. Let's dig into both so you can figure out which path makes the most sense for you.
The DIY Method: Printing at Home
Printing your own stickers gives you total control and instant gratification. It’s a fantastic option for small batches, trying out a few different designs, or when you just need a handful of labels right now. To get this done, you’ll need a few supplies.
First up is the paper. You can't just use any old copy paper; you need quality printable sticker paper. This stuff is specifically made to make ink look vibrant and, of course, it has an adhesive back. It comes in different finishes, too—I'm a fan of matte for a subtle, modern vibe, but glossy makes colors absolutely pop.
Your printer is the next piece of the puzzle. You don’t need some crazy expensive machine, but a decent inkjet that can handle photo printing will give you the sharpest results. The real key to making home-printed stickers look good is getting your printer settings just right.
- Always Do a Test Print: Before you start using your pricey sticker paper, run a test print on a regular sheet of paper. This little step saves so much headache by making sure everything is aligned properly.
- Dial in Your Settings: Open up your printer's software and find the quality settings. Crank it up to the highest option, which might be called "Best," "High," or "Photo Quality." Also, be sure to tell the printer what kind of paper you're using (e.g., "Glossy Photo Paper").
I can't stress this enough: don't skip the test print and settings check. It takes maybe five minutes, but it’s the difference between a crisp, perfectly centered sticker and a blurry, off-kilter disaster.
Partnering With a Professional Printer
If you're looking at a large run of stickers, need a unique die-cut shape, or want to play with specialty materials like holographic or clear vinyl, a professional printer is your new best friend. They have industrial equipment that produces flawless results you just can't replicate at home.
This is the route I almost always recommend for small businesses. A pro printer will nail your brand colors every single time and give you a durable, weatherproof product. If that sounds like what you need, we've got a whole guide on using custom stickers for your small business with more tips.
Getting your files ready for a professional is pretty simple:
- Export in High Resolution: Always save your final design as a high-resolution file. 300 DPI is the industry standard. PDF, AI, or a PNG with a transparent background usually work best.
- Add a Bleed: Most printers will ask for a "bleed." This is just a little extra bit of your design that extends past the cut line. It ensures that when they trim the sticker, your artwork goes all the way to the edge, leaving no awkward white slivers.
- Check Your Color Mode: Make sure your file is set to CMYK color mode. Your screen displays colors in RGB, but printers use CMYK. This quick check ensures the colors you see on screen are what you get in print.
Tapping into professional printing means you're part of a massive global industry. The self-adhesive labels market is a huge deal, projected to reach USD 55.92 billion as more and more businesses demand high-quality packaging and branding. It’s pretty fascinating to see how this market is expanding and the trends driving it.
Whether you decide to become a home-printing expert or team up with a pro, you now have the know-how to create your own sticker labels that look incredible and get the job done.
A Few Common Questions About Making Sticker Labels
Jumping into the world of custom stickers usually brings up a few questions. Trust me, you're not the first person to wonder about the little details that make a huge difference in how your labels turn out.
Let's walk through some of the most common things people ask, so you can get your project started on the right foot.
What’s the Best Software for Beginners?
If you're just dipping your toes into design, something like Canva is a fantastic starting point. It's built around a simple drag-and-drop system and comes loaded with templates, so you don't need a design degree to create something that looks awesome. It's a really forgiving and fun way to get your ideas out.
Once you're ready to get more serious and want total control, the professional go-to is Adobe Illustrator. Because it's a vector-based program, you can design something and scale it up to the size of a billboard (or down to a tiny product label) without it ever getting blurry.
How Do I Make My Stickers Waterproof?
The real secret to waterproof stickers isn’t some fancy trick—it all comes down to the material you pick from the start.
You'll want to choose a vinyl or BOPP (which stands for Biaxially Oriented Polypropylene) material. Since both are essentially plastics, they naturally repel water, oil, and other grime, making them perfect for products that might get wet or handled a lot.
Pro Tip: For seriously tough, long-lasting stickers, always add a protective laminate coating. This clear layer is the final defense against moisture, scratches, and the sun's UV rays, keeping your design from fading. It's what makes a sticker tough enough for a water bottle or even a car bumper.
What Resolution Should My Design File Be?
This one is crucial. For a sharp, professional-looking print, your design file needs to be 300 DPI (dots per inch) at its final print size. Think of this as the golden rule of printing.
If you use a lower resolution, like the 72 DPI standard for web images, your sticker will almost certainly look pixelated and blurry up close. It’s one of those things you have to get right from the beginning—so when you create your new document in your design software, setting it to 300 DPI should be the very first thing you do.
Die-Cut vs. Kiss-Cut: What’s the Difference?
Ah, the classic question! It all boils down to how the sticker is cut from its paper backing.
- Die-Cut Stickers: The blade cuts straight through both the sticker and the backing paper, creating a custom shape that perfectly matches your design. They look super clean and custom right off the bat.
- Kiss-Cut Stickers: Here, the blade just gently "kisses" the vinyl, cutting through the sticker layer but leaving the backing paper intact. This makes them way easier to peel and gives delicate designs a bit of extra protection.
Which one is right for you? It really just depends on the look you're going for and how you plan to use them.
Ready to bring your own sticker ideas to life? At everone prints, we help you create beautiful, durable custom labels that make your brand or project shine. Start designing your custom stickers today!