

Create Your Own Stickers Online A Simple Guide
So, you've got an idea for a sticker and you're wondering how to bring it to life? It's a surprisingly fun and straightforward process. With a spark of creativity and the right online platform, you can transform your design from a thought into a tangible sticker perfect for your laptop, business, or passion project.
From Sticker Idea to Reality
Ever see those awesome, one-of-a-kind stickers on someone's water bottle or a small business's packaging and wonder how they did it? You might be surprised to learn how simple it is. This guide will walk you through creating your own custom stickers, even if you don't consider yourself a "designer."

We're going to skip all the technical jargon. The truth is, online tools have made it incredibly easy for anyone to design and print high-quality stickers. It’s a creative outlet that has absolutely taken off.
Why Is Everyone Making Custom Stickers?
It all comes down to the power of personalization. People love things that are uniquely theirs, and the numbers back it up. The personalized stickers market, valued at USD 4.84 billion in 2025, is expected to skyrocket to USD 7.99 billion by 2034.
What's driving this? A massive 68% of people say they prefer custom-made products. You can dive deeper into these market trends over at GlobeNewswire.
This desire for uniqueness shows up everywhere, whether it's for:
- Branding a small business with a logo that sticks (literally).
- Celebrating personal events like a wedding or birthday with a memorable keepsake.
- Showing off your personality on everyday gear.
Consider this your starting point for a really cool process that ends with you holding something you actually made. For a more in-depth look, be sure to check out our complete guide on https://everone.shop/blogs/news/how-to-make-custom-stickers.
Designing a Sticker People Will Love
Before you even touch a design program, let's talk strategy. I know, it's tempting to jump right into the fun stuff, but a little prep work is the secret to creating a sticker that doesn't just look good, but actually does something.
First, ask yourself: what’s this sticker for? Is it a mini-billboard for your brand that you'll tuck into every order? A quirky giveaway for a trade show? Or maybe a personal memento for a wedding or birthday bash?
The answer to that "why" will guide every single design choice. A sticker destined for a laptop needs to pop with a bold, simple design, while one for a planner can afford to be a bit more detailed and delicate.
Nail the Design Basics
Good news: you don't need to be a pro graphic designer to make a killer sticker. I've seen some amazing designs come from total beginners who just kept a few key things in mind. When you go to create your own stickers online, these fundamentals will save you a world of headache.
-
Prioritize High Resolution: This is the big one. If you take away only one tip, let it be this: use a high-quality image. Your file should be at least 300 DPI (dots per inch). Anything less, and you risk a blurry, pixelated mess that looks amateurish.
-
Choose Bold Colors and Fonts: Your sticker has to grab attention in a split second. Think high-contrast colors that stand out and fonts that are a breeze to read. That elegant, swirly script might look great on your monitor, but it can easily turn into an unreadable smudge when printed at two inches wide.
A great sticker tells a story in a single glance. Simplicity is often more impactful than a cluttered, complex design. Focus on one central idea and make it shine.
If you're a small business owner, your stickers are a direct reflection of your brand. We've put together a whole guide on this topic—check out our tips on custom stickers for small business for more ideas on making your brand stick (pun intended!).
And if you're feeling a little stuck for ideas, don't be afraid to get creative with your brainstorming. Many designers are now utilizing AI for design inspiration to spark new concepts.
Once you have a clear vision, you're ready for the next phase.
Using an Online Sticker Maker Like a Pro
Alright, this is where your idea starts to become a real, hold-it-in-your-hand sticker. The best online design tools feel less like complicated software and more like a fun, creative space. To show you how it works, let's walk through a common project: making some killer die-cut stickers for a local band's merch table.
By the time we're done, you'll have the confidence to create your own stickers online for anything you can dream up.
Getting Your Artwork Uploaded
First things first, you need to get your design into the system. When you hit the upload button, you'll see a few file options. In most cases, a PNG file is your best friend.
Why a PNG? Simple: it handles transparent backgrounds beautifully. This is a huge deal. If the band's logo is a unique shape, a PNG ensures you won't get a clunky white box printed around it. A JPG, on the other hand, always has a solid background, which works for basic squares or circles but not for custom shapes.
Dialing in the Details
Once your design is uploaded, the real magic happens. This is your chance to tweak all the little things that make a sticker feel special. Most online tools give you an interactive preview that updates in real-time as you make changes.
You can see exactly how a small adjustment will affect the final product, which is incredibly helpful.
Here's a look at how different designs can be customized with unique cuts and styles, all within an online editor.
Thinking back to our band sticker, here are a few tweaks you'll probably want to make:
- Sizing it just right: Maybe the original logo file is huge. You can easily scale it down to a more practical size, like three inches wide, perfect for slapping on a laptop or a water bottle.
- Adding some text: What if the band wants to include their website or social media handle? A good editor lets you pop in a text box, pick a font that matches their vibe, and place it perfectly under the logo.
- Creating a sharp border: A clean white border (sometimes called an offset or die-cut line) can really make a complex design stand out. This feature automatically adds a crisp outline around your art, giving it that professional, polished look.
Your digital proof is everything. It’s the final sneak peek of what you're actually going to get. Zoom way in. Check for typos. Make absolutely sure the cut line is exactly where you want it. This one step will save you a world of headaches.
Think of the design tool as your personal workshop. Play around with different sizes, add a catchy tagline, or see how a different cut style totally changes the sticker's personality. Spending a little extra time here is what turns a good design into a truly great one.
Choosing The Right Materials And Finishes
Okay, your design is locked in. Awesome! But that's only half the battle when you create your own stickers online. The material and finish you pick are what bring that design to life, determining how it looks, feels, and holds up out in the wild.
Seriously, think about where this sticker is going to live. A sticker for a laptop that just goes from your desk to a coffee shop has totally different needs than one you’re slapping on a car bumper to brave the sun and rain.
Durable Vinyl Vs. Classic Paper
When it comes to materials, it usually boils down to two main players: tough-as-nails vinyl or classic paper. Each has its place, and choosing the right one is the key to making sure your sticker looks incredible and lasts as long as you need it to.
For anything that’s going to face the elements, you’ll want to go with durable, waterproof vinyl. This is your hero for water bottles, cars, skateboards, or any outdoor gear. It’s built to withstand sun, rain, and scratches, making it a solid investment for stickers that need to go the distance.
On the flip side, classic paper materials are perfect for indoor applications. They’re a more budget-friendly choice for things like sprucing up product packaging, decorating a planner, or for one-time event handouts where you don't need to worry about moisture. This personal use market is actually exploding, with an expected growth rate of 7.5% annually through 2033. It just goes to show how much people love adding that personal touch to their stuff.
It's also pretty cool to see that eco-friendly options are gaining traction, with sustainable sticker production jumping by 20% in the last five years. It’s always great to have greener choices.
Unforgettable Finishes
Once you've got your material sorted, the finish is what adds that final pop of personality. This is all about the sticker’s texture and how it plays with the light.
- Glossy Finish: This is that classic, shiny look. It makes colors super vibrant and gives your sticker a high-impact feel that grabs attention instantly.
- Matte Finish: If you're going for a more modern, subtle vibe, matte is your best friend. It has a smooth, non-reflective surface that looks clean, sophisticated, and photographs like a dream (no glare!).
- Holographic Finish: Want your sticker to be a real showstopper? Holographic is the answer. It creates this mesmerizing rainbow effect that shifts and shimmers as the light changes, turning even a simple design into a piece of art.
This little decision tree can help you picture how all these choices fit together.
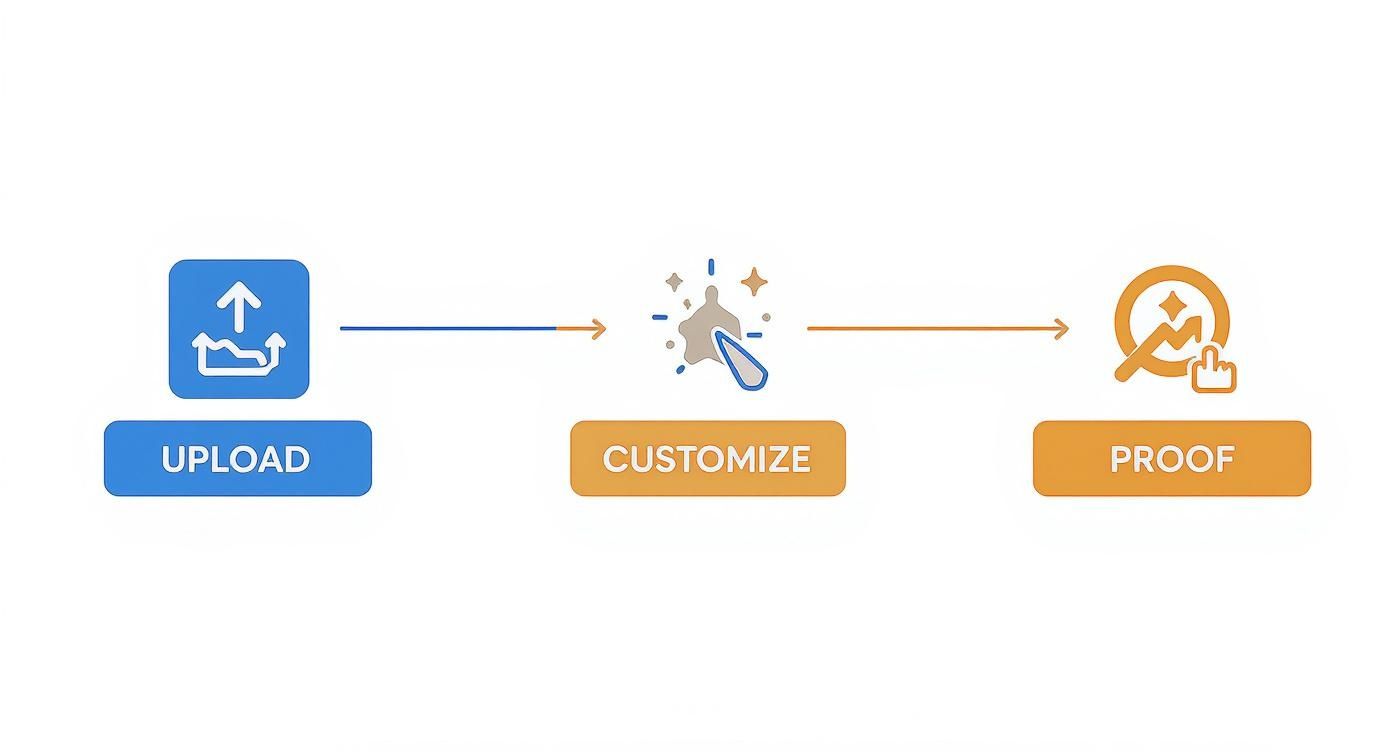
As you can see, the path from your idea to the final sticker is a straightforward journey.
Sticker Material And Finish Selector
To make it even easier, here's a quick guide to help you match the right material and finish to your project.
| Material/Finish | Best For | Key Feature |
|---|---|---|
| Durable Vinyl | Outdoor use, water bottles, cars, laptops | Waterproof & scratch-resistant |
| Classic Paper | Indoor use, packaging, journals, planners | Cost-effective & great for dry surfaces |
| Glossy Finish | Bold designs, promotional stickers | High-shine, makes colors pop |
| Matte Finish | Sophisticated looks, product labels | No-glare, smooth, elegant feel |
| Holographic Finish | Eye-catching art, special editions | Shimmering, iridescent rainbow effect |
Think of this table as your cheat sheet for making the perfect choice every time.
Here's the secret to a professional-looking sticker: match its material and finish to its job. A waterproof vinyl sticker is perfect for a Nalgene bottle, while a beautiful paper sticker is just right for a wedding favor. Every choice should serve your design’s ultimate purpose.
For a really premium option that makes your artwork pop, you should definitely explore the world of custom die-cut stickers. These are precision-cut to follow the unique outline of your design, giving them a clean, professional look that’s hard to beat.
Getting Your Order Just Right
https://www.youtube.com/embed/A2UFOp0XsfU
Alright, you’ve done the creative part—your design is perfect, and you’ve picked out the materials. Now comes the easy, but super important, part: placing your order and making sure it’s flawless.
The last, and arguably most crucial, hurdle is signing off on your digital proof. I can't stress this enough: treat this as your final chance to spot any sneaky typos, check that everything is aligned perfectly, or notice if a color looks a little off. Take a minute, zoom in on the details, and give it a thorough once-over. A few seconds of review here can save a lot of headaches later.
A Quick Tip on Ordering Smart
When you’re ready to finalize your sticker order, think strategically about the quantity. It might seem counterintuitive, but bumping up your order size, even slightly, can often slash the price you pay per sticker. This is a game-changer for small businesses trying to stretch a budget or anyone planning for an event.
After you place your order, you’ll get a timeline for when to expect your stickers. This is great for planning, especially if you have a product launch or market day coming up.
Once your stickers arrive, think about how you'll use them. A well-placed custom sticker can completely transform your e-commerce packaging solutions and create a memorable unboxing experience for your customers. Following these simple checks ensures you get a fresh batch of high-quality, custom-made stickers from our collection that you'll be excited to use.
Got Questions About Making Stickers Online? We've Got Answers
Jumping into your first sticker project is exciting, but a few questions almost always pop up. Let's walk through the common ones we hear all the time so you can order your stickers with complete confidence.
What’s the Best File Type for My Sticker Design?
Great question. For most designs, a high-resolution PNG file is your best friend. The big advantage here is its ability to handle transparent backgrounds. This means you won’t get that clunky white box printed around your cool, custom-shaped artwork.
If you happen to have your design in a vector format—like an AI file from Adobe Illustrator or an SVG—that’s the gold standard. Vectors can be scaled up or down to any size without losing a speck of quality. No worries if all you have is a JPG, though! Just make sure it’s a high-quality one, at least 300 DPI (dots per inch), to keep it looking crisp and professional.
Should I Choose a Die Cut or Kiss Cut Sticker?
This is all about how you want your stickers to look and feel before they’re applied.
- A die-cut sticker is cut all the way through the vinyl and the paper backing, matching the exact shape of your design. They look super polished and custom right out of the box.
- A kiss-cut sticker, on the other hand, is only cut through the top vinyl layer. The backing paper is left as a square or rectangle, which makes the sticker way easier to peel and protects any delicate pointy bits from getting bent.
Think of it this way: die-cut gives you that immediate "wow" factor with its custom shape. Kiss-cut is all about practicality and an easy-peel experience. Both look absolutely identical once they're stuck on something!
How Do I Make Sure My Colors Print Just Right?
Ah, the classic screen-to-print color question. What you see on your monitor (which uses an RGB light-based color model) can sometimes look a little different from the final printed product (which uses CMYK ink-based colors).
Don't sweat it too much, as most online printers automatically handle this conversion pretty well. But if you want to be extra sure, designing in a CMYK color profile from the start is a pro move.
The most important step? Always, always check the digital proof the printer sends you. This is your final sneak peek of what the colors will look like before the whole batch gets printed.
Ready to turn that awesome idea into a real, hold-it-in-your-hand sticker? At everone prints, we've made the whole process simple. Just upload your art, pick your materials, and we'll get a batch of top-notch custom stickers sent straight to you.