Create a Family Gallery Wall You'll Love
Share
A family gallery wall is so much more than just a collection of pictures. It's the heart of your home, a space where your most cherished memories come to life. Think of it as turning a blank wall into a beautiful canvas that tells your family's unique story.
Bringing Your Family's Story to Life on Your Walls

You know that empty wall in the hallway? Or the big space above the sofa? It’s not just empty space; it’s an opportunity. It’s a chance to build a visual timeline of your life, one filled with all the joy, growth, and connection that makes your family special. A thoughtfully designed gallery wall isn't just decor—it becomes a conversation starter and a daily dose of happiness.
This move toward personalizing our homes isn't just a small trend. The global wall décor market, which covers everything from photo frames to art prints, is expected to jump from $70.5 billion in 2025 to $85.2 billion by 2035. That's a huge shift, proving how much we all want our homes to feel truly ours. You can dig into more of this data over at Future Market Insights.
Why Create a Gallery Wall?
At its core, a gallery wall is a celebration of your family. It's not about just filling a wall; it’s about curating an experience that reflects who you are.
- It Tells Your Story: You can showcase the big moments—weddings, new babies, graduations—right alongside the candid, everyday snapshots that perfectly capture your family's spirit.
- It Adds Tons of Personality: The photos you choose, the frames you pick, and the layout you design all come together to reflect your family's unique style. It's what makes a house feel like your home.
- It Creates an Instant Focal Point: A great gallery wall can anchor an entire room, giving the eye a beautiful place to land and tying all your other decor elements together.
The most stunning gallery walls often look like they've been collected over time. Don't be afraid to mix a professional portrait with a blurry, joyful snapshot from your phone. It's that blend of moments that creates a display with real heart.
This guide is here to walk you through the entire process, from picking the perfect photos to getting them hung just right. The idea of a gallery wall can feel a bit overwhelming, but I promise it's easier than it looks. We're going to break it all down with practical tips and friendly advice.
And if you're looking for even more inspiration, you can find other creative family photo display ideas right here. By the time you're done, you'll have the confidence and know-how to create a gallery wall you'll absolutely love for years to come.
Curating Photos That Tell Your Unique Story

This is where the real fun begins. Choosing the photos is what breathes life into your gallery wall, turning it from a design project into the heart of your home. It’s less about finding technically perfect pictures and more about capturing the genuine spirit of your family. The most compelling gallery walls feel like a collection of memories, each one telling a piece of your unique story.
Go beyond the classic, posed family portraits. While one or two can serve as a beautiful anchor for your collection, it’s the candid shots that really make a gallery wall sing. Think about that goofy face your toddler makes, a spontaneous hug captured on a Tuesday afternoon, or even a blurry action shot from a chaotic family vacation. These are the images brimming with emotion and personality. A great gallery wall should feel collected over time, not just decorated in an afternoon.
Building a Cohesive Collection
I get it—the biggest worry is often that mixing and matching different photos will end up looking like a cluttered mess. But creating a sense of harmony is easier than you think, and it doesn't mean every photo has to look the same.
A great starting point is to land on a theme or a mood. This could be anything from:
- A Color Story: You could pull photos that all share a similar color palette—maybe soft pastels, warm earthy tones, or even bright, vibrant primary colors.
- An Editing Style: Applying the same photo filter or preset across your images is a quick way to create a unified look. You could go for a warm vintage vibe, a crisp modern feel, or anything in between.
- A Timeline: Tell a story by arranging photos chronologically, showcasing your family's growth and journey through the years.
Here's a classic designer trick I love: mix black and white photos with color prints. The black and white images bring a touch of timeless elegance, while the color photos inject life and energy. It's this contrast that creates fantastic visual interest and helps balance the whole collection beautifully.
Looking Beyond Just Photographs
Remember, your family gallery wall doesn't have to be limited to just photos. Weaving in other meaningful items is what can make the display deeply personal and truly one-of-a-kind. This is how you transform a simple photo arrangement into a true reflection of your life.
Think about incorporating pieces like:
- A framed piece of your child’s first masterpiece
- A beautifully designed print of a family motto or a meaningful quote
- A postcard or ticket stub from an unforgettable trip
- A small, sentimental object, like a baby's first shoe mounted in a shadowbox
Don't overthink it. If an item makes you smile and brings back a happy memory, it has a place on your wall. The goal is to surround yourself with things that tell your story and bring you joy every day.
Creating a home that feels personal is more popular than ever. In the United States, the wall decor market was valued at an incredible $24.06 billion in 2025, and it's still growing. A huge part of this is driven by younger generations who are 30% more likely to invest in decor that reflects who they are—like a custom family gallery wall. You can read more about this trend over at Market Report Analytics.
Once your collection is curated, it's time to bring it into the physical world. Whether you prefer the classic look of a matte print or the artistic feel of a canvas, the finish you choose really sets the mood. For those extra-special photos, exploring options for creating custom art from your photos can help turn a fleeting moment into a lasting, beautiful keepsake.
Finding the Right Frames and Layout for Your Space
Alright, you’ve sifted through all your favorite photos and mementos—now for the fun part: bringing it all together. The frames and layout you choose are what will elevate a collection of individual pictures into a single, cohesive work of art. This is how you make your family gallery wall look intentional and absolutely beautiful.
Let's talk frames first. This is a huge part of the final look. Are you picturing something clean and uniform, with every frame matching perfectly? Or do you love a more eclectic, "collected-over-time" vibe with a mix of different styles, colors, and textures? Honestly, there’s no wrong answer here. It’s all about what feels right for your home.
Choosing Your Frame Style
Think about the materials that speak to you. Warm woods can bring in a cozy, rustic feel, while sleek metals often read as more modern and industrial. You can never go wrong with classic black or white frames—they’re incredibly versatile and really make the colors in your photos pop.
If you decide to mix and matching, I've found a good rule of thumb is to stick to no more than three main styles. This keeps the wall from looking too chaotic. For instance, you could bring together:
- Simple Black Frames: These provide a clean, modern foundation.
- Natural Wood Frames: Perfect for adding a touch of warmth and texture.
- A single Metallic Frame: A pop of gold or silver can act as a fantastic accent piece.
This approach gives you plenty of visual interest without overwhelming the real stars of the show—your photos.
Mapping Out the Perfect Layout
Now, let's figure out the arrangement. This isn't about following strict rules; it's about finding a layout that feels balanced and looks great on your specific wall. Before you even think about grabbing a hammer, do this one thing: lay everything out on the floor. Seriously, it's a game-changer. Measure your wall space, then use painter's tape to mark off that same area on your floor.
This little trick lets you play around with placement, see how the different pieces interact, and get your design just right without putting a single unnecessary nail hole in the wall. When you land on an arrangement you love, just snap a quick photo on your phone to use as a guide. To get the most visual impact, it's helpful to understand the core principles of how to design a feature wall, which can really guide your thinking on layout and aesthetics.
Here’s a little tip I swear by: keep the spacing between your frames consistent, usually around 2-3 inches apart. It creates a nice visual rhythm and stops the wall from looking cluttered, giving each piece its own room to breathe.
As you start arranging things, you'll see that different layouts create entirely different moods.
Gallery Wall Layout Style Comparison
Choosing a layout style is all about matching the vibe of your room. Are you going for something structured and formal, or more free-flowing and artistic? This table breaks down a few popular options to help you decide.
| Layout Style | Best For | Vibe | Key Tip |
|---|---|---|---|
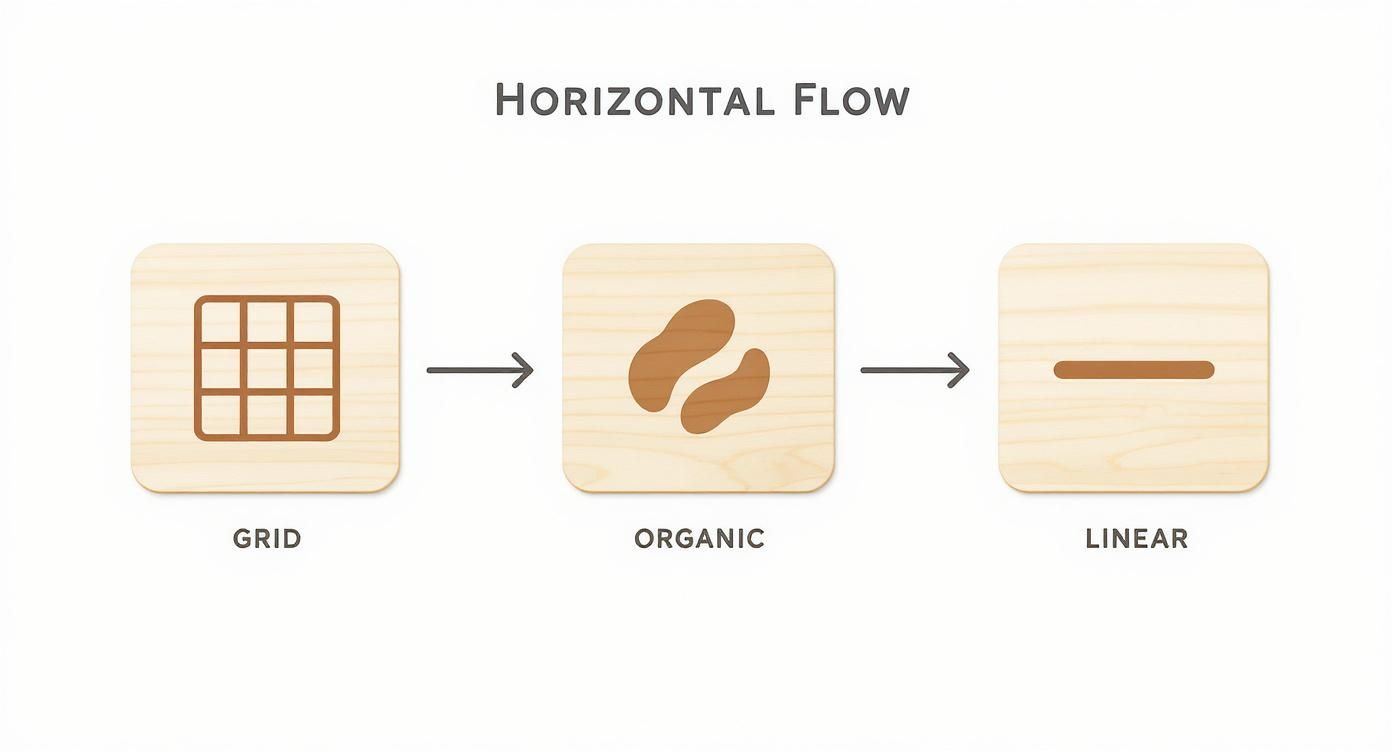
| Grid | Formal spaces like living rooms or dining areas. | Modern, organized, and clean. | Use identical frames and maintain precise, equal spacing. |
| Organic/Salon | Staircases, creative spaces, or large feature walls. | Eclectic, personal, and artistic. | Start with your largest piece off-center and build around it. |
| Linear | Hallways or walls above sofas and headboards. | Simple, streamlined, and balanced. | Align all frames along a central horizontal or vertical line. |
No matter which style you choose, you're tapping into a huge trend. People are craving homes that tell their unique stories, which is why the wall art market is booming—it was valued at $68.9 billion globally in 2025 and is projected to skyrocket to $130.2 billion by 2035.
This growth is all about our desire for personal, meaningful decor. Of course, getting the dimensions right is a crucial part of the process. If you need help figuring out what will fit best, you can learn more about selecting the perfect custom canvas size to complement your layout.
How to Hang Your Gallery Wall Without the Headache
Alright, let's get those beautiful frames up on the wall. I know this is the part that can feel a little intimidating, but trust me, it doesn't have to be a nightmare. We’re going to use a simple trick that designers and decorators swear by to get it right the first time—without turning your wall into swiss cheese.
The secret? Paper templates. Seriously, it's a game-changer. Grab some craft paper, the back of some old wrapping paper, or even newspaper, and trace each of your frames. Cut out these paper shapes, and suddenly you have a lightweight, easy-to-manage replica of every piece in your collection.
Plan Your Layout Directly on the Wall
This is where the magic happens. With your paper cutouts and a roll of painter’s tape, you can start arranging your entire gallery right on the wall. It’s the ultimate "try before you buy" for your layout.
You get to see exactly how it will look in your space. Step back, squint a little, and see how it feels. Want to move that 8x10 up a few inches? Or swap two photos around? Go for it. You can play with the arrangement as much as you want with zero commitment and, more importantly, zero holes in the wall.
Once you’ve found a layout that just feels right, mark the nail spot for each frame directly onto its paper template. It's a foolproof method for getting the placement perfect before you pick up a hammer.
Pro Tip: Aim to hang the center of your entire collection at eye level. The industry standard for this is about 57 inches from the floor. It’s a small detail that makes the whole display feel professionally installed and comfortable to look at.
Thinking about different arrangements? This handy visual shows a few popular ways to group your photos.

As you can see, a structured grid gives off a more formal, classic vibe, while an organic, salon-style layout feels more playful and eclectic.
Get Your Spacing and Hardware Right
One of the keys to a polished, cohesive look is consistent spacing. A good rule of thumb is to leave 2 to 3 inches of space between each frame. This gives every photo enough breathing room so it doesn't feel cluttered, but keeps them close enough to feel like a single, unified collection. Use a measuring tape to check the gaps between your paper templates before you hang a thing.
When it comes to the actual hanging, choosing the right hardware is crucial. If you have a larger, heavier piece like a big canvas, you’ll want the security of a traditional nail or screw anchored directly into a wall stud. If you’re curious about larger formats, you can find some great advice on how to print photos on canvas to make sure they're displayed beautifully.
For most of your lighter frames, you’ve got a few great options:
- Small Picture Hanging Nails: These are my go-to for standard frames. They're strong and leave behind only a tiny, easily-fillable pinhole.
- Adhesive Strips: Renting or just really hate making holes? These damage-free strips are a fantastic alternative. Just be sure to check the weight rating on the package to match it to your frame.
With your hardware chosen, you’re ready for the final step. Remove the paper templates one by one, hang up your frames, and use a level on each piece to make sure it's perfectly straight. This is the moment your beautiful family gallery wall finally comes to life.
Styling and Growing Your Gallery Wall Over Time

The best part about creating a family gallery wall? It’s never truly finished. Think of it less as a project and more as a living collection that grows and changes right along with your family. The real magic happens with the little styling details you add now and how you let it evolve over the years, turning a simple display into a dynamic story of your life.
Getting the visual balance right is a great place to start. If you have a large, commanding piece—maybe a big canvas print from a family vacation—let it be the star of the show. I often suggest placing it just a bit off-center. This little trick creates a natural focal point without feeling too stuffy, encouraging your eyes to wander across all the other photos.
Surround that main anchor piece with your smaller frames, and don't be afraid to mix and match orientations. A few horizontal shots next to some vertical ones adds so much visual interest and keeps the layout from feeling rigid.
Adding Dimension and Personality
Want to take your gallery wall from good to great? Start mixing in three-dimensional objects. This is my favorite trick for breaking up the flat surface of photos and adding a ton of texture and personality.
You could weave in elements like:
- A small floating shelf holding a sentimental knick-knack or a little succulent.
- Your child’s initial in a cool wooden or metal letter.
- An old family heirloom, like a vintage camera, that connects to your story.
These little additions make the entire display feel more curated, more personal, and truly a part of your home.
A gallery wall tells the story of your family, so every element should feel like a chapter. It’s not just about the photos; it’s about the memories and objects that represent your life together.
Lighting can also make a huge difference. You can learn a lot by understanding accent lighting, which is all about highlighting specific features in a room. A small, adjustable picture light mounted over a particularly cherished photo adds a touch of drama and really draws the eye to that special moment.
Keeping Your Gallery Wall Fresh
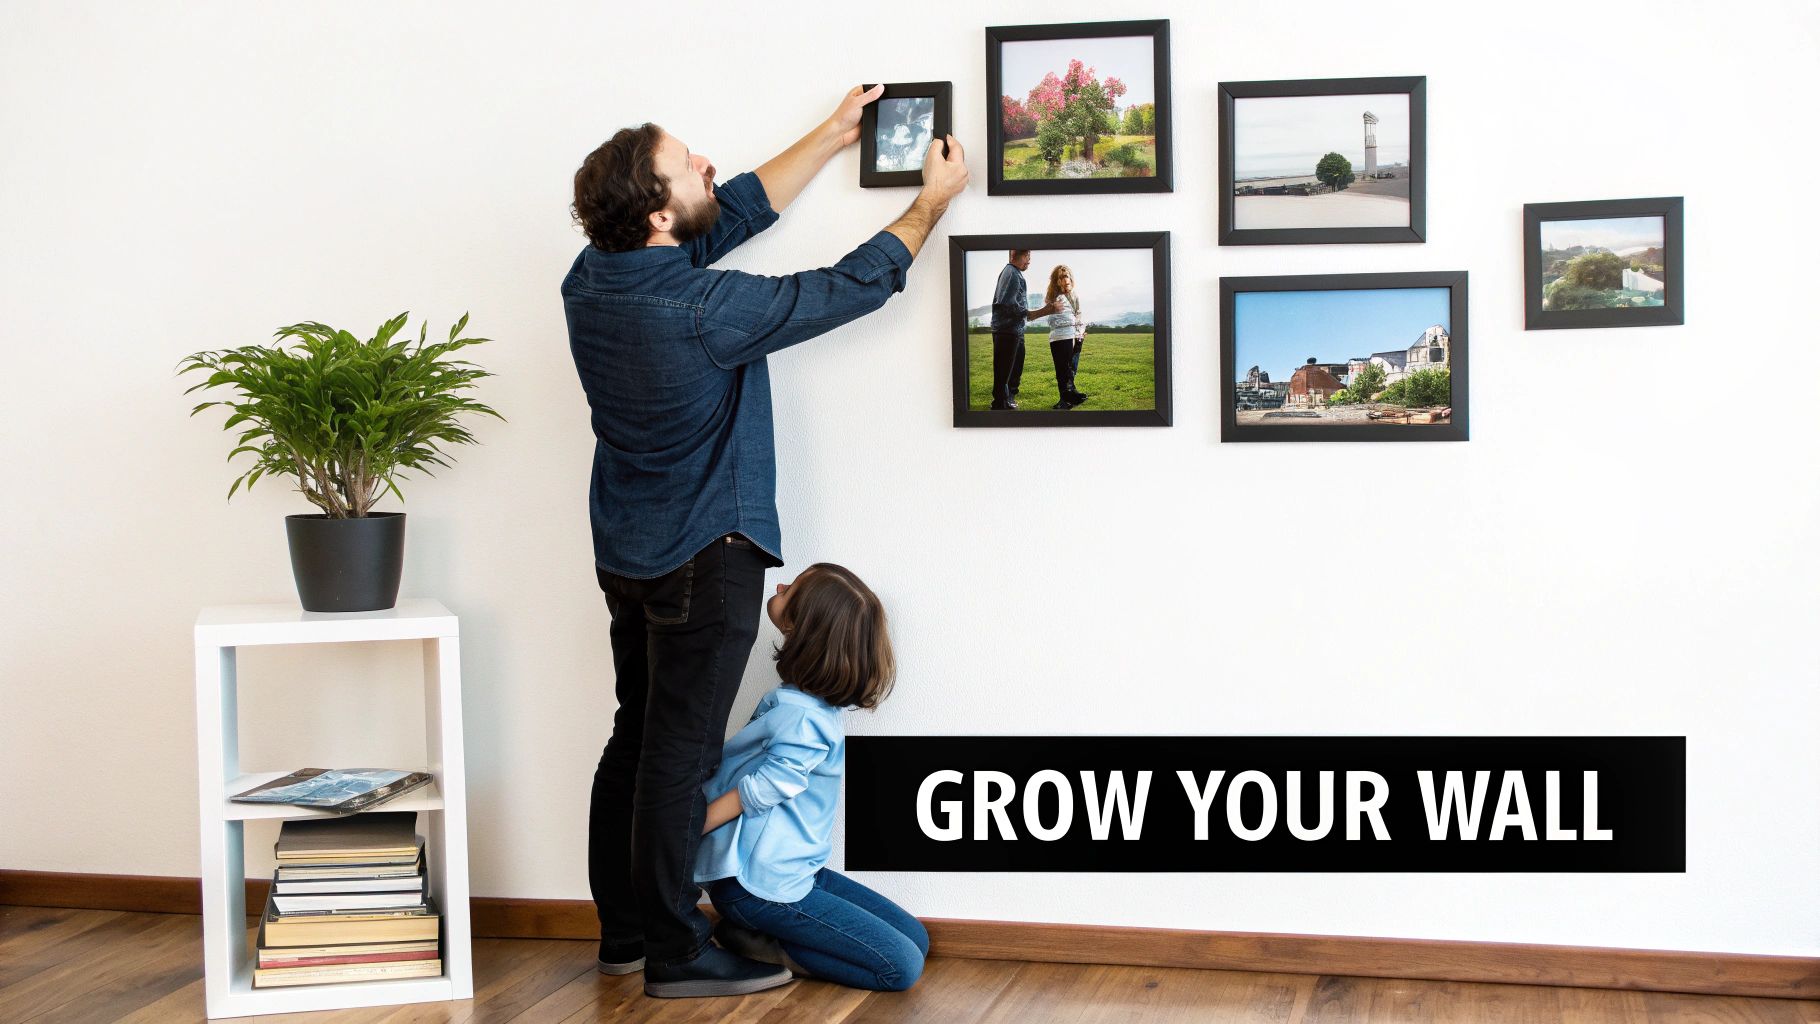
A gallery wall is meant to grow with you. As new memories unfold—graduations, a new puppy, a milestone birthday—your wall should be there to reflect them. The secret is making updates feel easy, not like a total overhaul.
I’m a big fan of the "one in, one out" approach. When you get a new print you’re dying to display, just swap it into an existing frame. This keeps your layout intact while the content stays fresh.
You could even designate one or two frames as your "rotating spots" for the latest and greatest snapshots. That way, your gallery wall is always a timely, evolving, and deeply personal reflection of your family's beautiful, ongoing journey.
Your Gallery Wall Questions, Answered
Even with a perfect plan, you're bound to have a few questions pop up once you start laying things out. Hitting a small snag or second-guessing a choice is totally normal. Let's walk through some of the most common hurdles to get you over the finish line with confidence.
One of the first things people ask is about mixing frame styles. My answer? Go for it! A curated mix of frames—maybe a simple black one next to a warm wood tone, with a pop of antique gold—is what gives a gallery wall its unique character and charm.
The secret to making it look intentional, not chaotic, is to find a common element. You could stick to a specific color family (like different shades of wood and neutral tones) or make sure all the frames have a similar profile, whether that’s modern and slim or a bit more ornate.
What If I'm Working with a Small or Awkward Space?
You don't need a massive, blank wall to create a stunning gallery. In fact, some of the most beautiful and personal displays are the ones tucked into unexpected corners of a home.
- Stairways: This is a classic for a reason! An organic layout that climbs along with the stairs is a fantastic way to tell your family's story visually.
- Narrow Hallways: In a tight spot, a clean, linear arrangement is your best friend. Hang your frames in a single, crisp line, either horizontally or vertically, to create a sense of calm and flow.
- Around Corners: Don't let a corner stop you. Wrapping your gallery from one wall to the next adds a really cool, custom architectural feel to your space.
I always tell people to treat limitations as creative challenges. That weird nook or short, forgotten wall can easily become the most eye-catching and meaningful feature in your home with just a few thoughtful photos.
How Do I Hang on Tricky Surfaces Like Brick or Plaster?
Tackling anything other than standard drywall can feel a little daunting, but I promise it's completely manageable with the right hardware. For a brick wall, you'll need a special masonry drill bit to make a pilot hole for an anchor and screw. It’s a couple of extra steps, but the result is rock-solid.
If you're in an older home with plaster walls, the main goal is to prevent cracking. The best approach is to drill a small pilot hole before you gently tap in your picture hook. For heavier pieces, I highly recommend using two hooks to distribute the weight evenly and reduce the stress on the plaster.
Can I Mix Photos with Other Art and Objects?
Yes, please do! Think of your gallery wall as a scrapbook page for your home. It’s telling your family’s story, and that story is so much richer when you weave in more than just photographs.
This is your chance to really inject your personality. Consider adding things like:
- A framed quote that means something to you
- A small abstract print you picked up on vacation
- Your kid’s latest masterpiece, properly framed
- A piece with interesting texture, like a small woven hanging
Mixing in these different elements creates a layered, collected-over-time look that feels truly authentic. It transforms your wall from a simple photo display into a genuine reflection of your family’s life, style, and history.
Ready to turn those cherished memories into art that will last a lifetime? At everone prints, we’re passionate about creating high-quality custom canvas prints and posters that bring your photos to life. Start creating your personalized pieces today!
