

How to arrange pictures on the wall: Pro Tips
Staring at a blank wall can feel a little daunting, I get it. But the secret to arranging pictures isn't about following some rigid set of rules. It’s about telling a story. Before you even think about hammers and nails, take a minute and decide on the vibe you're going for. Do you want a cozy, eclectic mix of family memories, or are you aiming for a sleek, modern display of your favorite art?
This first step is just about setting an intention. It's the gut feeling that will guide every other choice you make, from the frames you pick to the final layout.
Finding Your Gallery Wall Style
Before you grab a single frame, the most crucial part is figuring out the mood and theme. A really great gallery wall feels intentional. It's a reflection of your personality and fits right in with the rest of the room. Don't get hung up on making every single piece match perfectly—the real goal is creating a sense of cohesion, not total uniformity.
Think of it like this: your wall is telling a visual story. What do you want it to say? It could be a narrative of your life, a showcase of your artistic tastes, or simply a collection of colors and shapes that just make you happy.
Gather Your Pieces with Purpose
Start by pulling together everything you're even considering hanging. And don't just limit yourself to framed photos or prints. The best gallery walls often mix in other elements to add texture and depth.
- Personal Photos: I love mixing black-and-white shots with color photos. It instantly adds a layer of visual interest.
- Art Prints: Pull in paintings, illustrations, or abstract pieces that pick up on the colors already in your room.
- Meaningful Objects: This is where the magic happens. Think about small mirrors, woven tapestries, vintage postcards, or even a framed piece of your kid's artwork. These unique wall art ideas are what make a gallery wall feel truly yours.
- Textural Elements: An embroidered piece still in its hoop or a small, shallow basket can be a fantastic way to break up all the flat, glass-fronted frames.
My go-to method, every single time, is to lay everything out on the floor first. This is my creative playground. It lets me see how all the different colors, textures, and sizes play together before I commit to putting a single hole in the wall.
Establish a Strong Anchor Piece
Okay, once you have your collection spread out, find that one standout item that will be your anchor. This is usually your largest or boldest piece, the one your eye is naturally drawn to.
Placing this anchor first gives your whole arrangement a clear focal point and makes building out the rest of the display so much easier. I usually position it slightly off-center—this little trick encourages your eyes to wander across the entire collection instead of just getting stuck in one spot. From there, start adding the smaller pieces around it, balancing horizontal frames with vertical ones to create a really nice, dynamic flow.
Planning Your Layout Without Making a Mark
Want to know a little secret that's saved me from patching up countless nail holes? Always plan your gallery wall on the floor first. Seriously. This is where the real magic happens, long before a hammer ever gets near your wall. It’s your chance to play around, experiment, and nail the layout without any of the commitment.
The whole process is surprisingly simple but incredibly effective. Just grab some kraft paper (or even old wrapping paper) and scissors. Trace each of your frames onto the paper and cut out the shapes. Think of these as your art placeholders—they let you visualize the scale and balance of the whole arrangement.
Now, using painter's tape that won't mess up your paint, start sticking these paper templates on the wall. This is your creative sandbox. Don't be shy about moving things around. Step back, look at it from different angles, and see how it feels. I always recommend living with the paper layout for a day or two. It's the best way to be absolutely sure you'll love it.
Exploring Popular Picture Arrangements
How you arrange your pictures really sets the tone for the entire room. A structured, symmetrical grid of identical frames gives you that formal, clean vibe that’s perfect for a minimalist space. On the other hand, an organic "salon hang"—with its mix of sizes, orientations, and frame styles—feels much more eclectic and personal. It’s ideal for telling a story.
This infographic breaks down the essential first steps for figuring out your style.
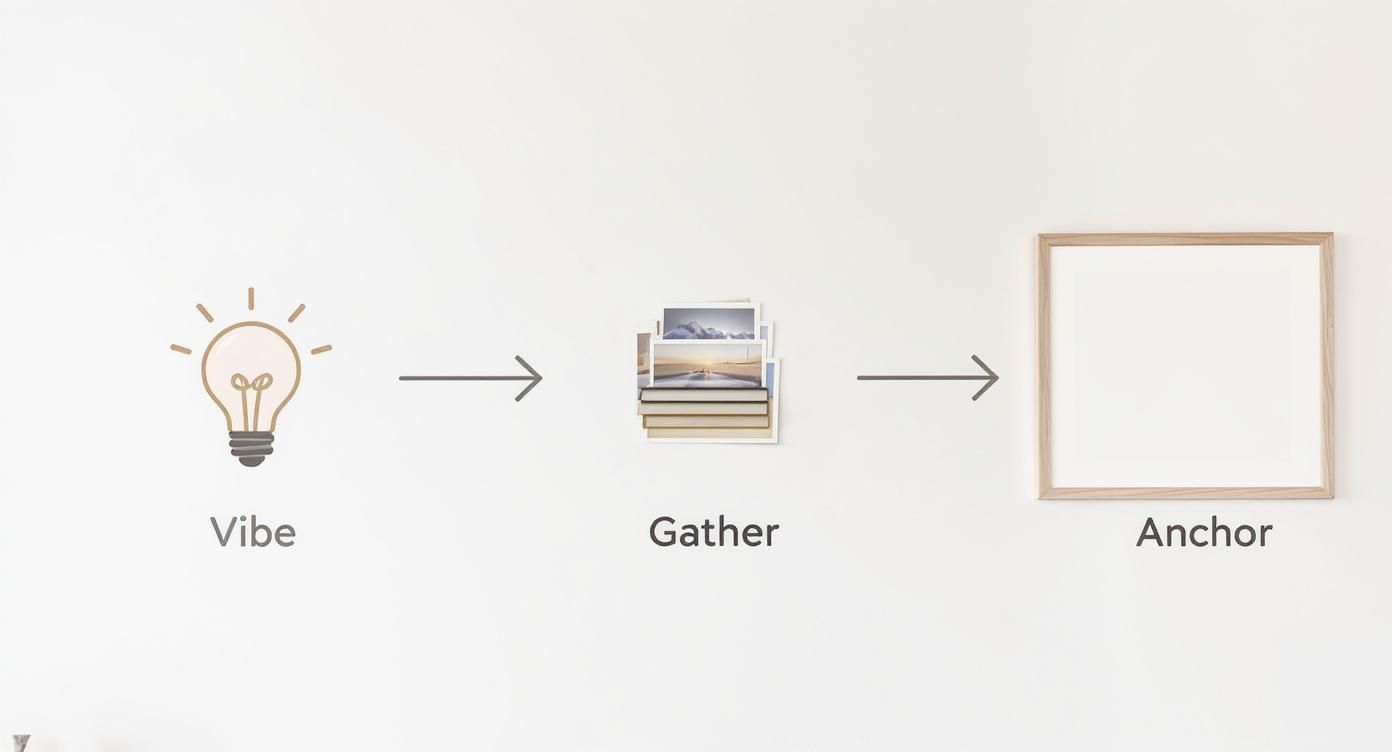
As you can see, starting with a clear vision, gathering your pieces, and picking an anchor piece are the building blocks of any great layout.
There's a reason we're all so into this. The demand for flexible home decor is huge. In fact, wallpaper and wall art (like prints and posters) made up 37.9% of the global wall art market back in 2022. People love decorations they can easily change and rearrange. In homes, we're constantly experimenting with everything from perfect grids to more free-form clusters. You can dive deeper into these trends over at Grandview Research.
The Floor Plan Method
If taping paper templates to the wall sounds like a bit too much effort, there's an even simpler way. Just measure the wall space you're working with and use painter's tape to mark out those exact dimensions on your floor. Then, you can arrange your actual framed pieces right inside that taped-off rectangle.
This floor method is my personal go-to. It lets you see how the real colors, textures, and frames all play together, giving you a much truer preview of how it will look on the wall.
Once you’ve got an arrangement on the floor that you love, the rest is easy.
- Snap a Photo: Grab your phone and take a quick picture to use as your map.
- Hang the Anchor First: Start with your largest or most central piece and get it on the wall.
- Build Around It: Using your photo as a guide, start adding the surrounding frames. A good rule of thumb is to keep a consistent spacing of about 2-3 inches between each one.
This little bit of pre-planning is the single best thing you can do to get a professional, perfectly spaced look without any of the guesswork. It turns a potentially stressful job into a fun, creative project and ensures your finished gallery wall looks intentional and beautifully balanced.
Choosing Frames to Unify Your Collection
Think of your frames as the supporting cast that makes your artwork the star of the show. They’re the secret weapon for turning a random collection of photos and prints into a stunning, cohesive display. This is your chance to tie everything together, even if the art itself is all over the place.
The goal isn't to make everything identical. It’s all about creating a common thread that runs through each piece, giving you a polished look without feeling chaotic.
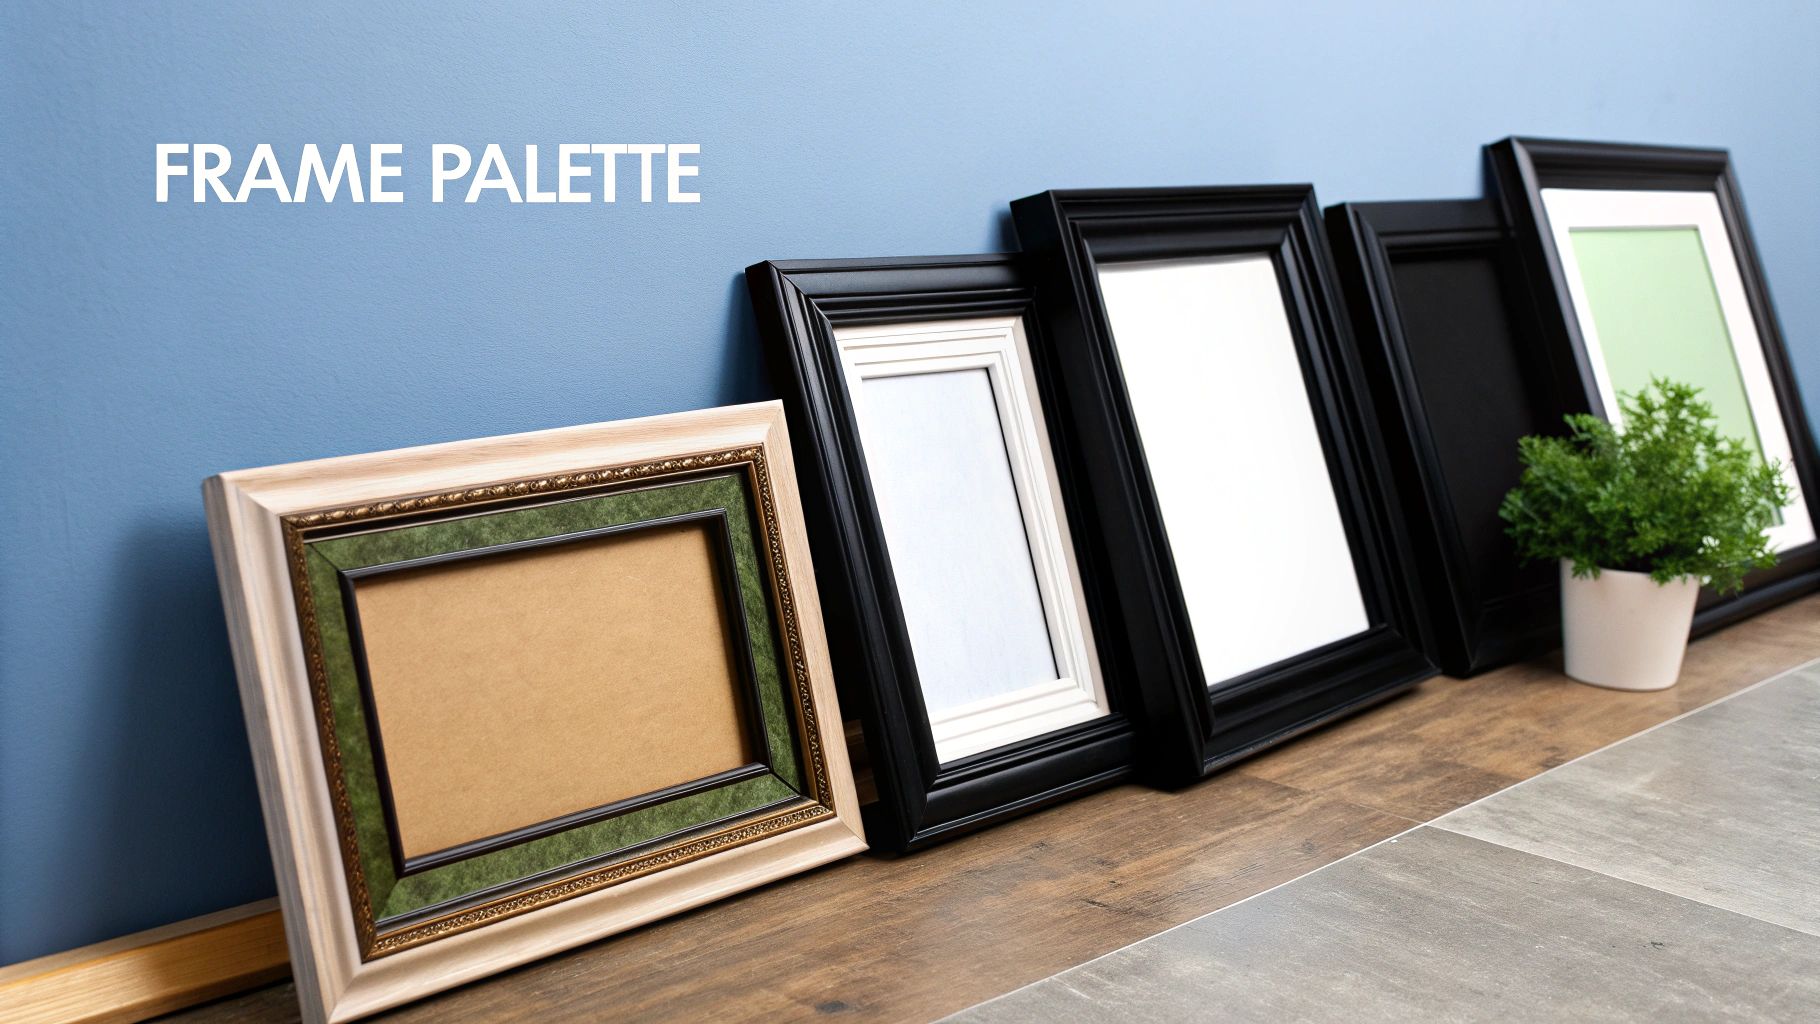
Creating a Cohesive Frame Palette
One of the easiest tricks I've picked up over the years is to stick to a tight color palette for the frames. This doesn't mean you're stuck with just one color, but keeping it simple creates harmony right away. A great place to start is with a classic trio: black, white, and one natural wood tone.
This combo is my go-to because it’s so incredibly flexible.
- Black Frames: They create a bold, classic outline that makes the colors in your art really pop.
- White Frames: These give off a clean, airy vibe, perfect for modern art or a minimalist aesthetic.
- Wood Frames: Nothing beats wood for adding warmth, texture, and a bit of organic character.
Working with a curated palette like this means you can pair a sleek, modern frame with a more ornate vintage find, and they’ll still look like they belong in the same room. It lets you get creative with finds from thrift stores or flea markets, knowing they’ll slot right into your master plan.
Don’t be afraid to mix things up. A good rule of thumb is to start with three frame styles. Try pairing two simple styles (like thin black and natural wood) with one more decorative option, like a pop of gold, to add a little flair.
The Strategic Use of Matting
Okay, let's talk about one of the most underrated tools for a professional-looking gallery wall: matting. That simple white border inside the frame does more than just fill empty space—it gives your art some much-needed breathing room. This is especially true for smaller pieces that can easily get swallowed up in a bigger arrangement.
A wide mat can make a little 5x7 photo feel as important as a much larger piece, helping it hold its own. It's also a fantastic way to unify artwork of different sizes. Got a bunch of photos in weird dimensions? Pop them into same-sized frames with custom-cut mats, and you can instantly create that clean, satisfying grid look.
For those truly special memories, seeing how professionals are turning photos into wall art can offer some incredible inspiration on how to use matting and framing to really elevate your favorite shots.
Whether you're splurging on custom framing for a key piece or hunting for unique finds, your frames are what will transform your wall from a collection of pictures into a true gallery experience.
Mastering Measurements for Perfect Placement
https://www.youtube.com/embed/29lzibkKeAI
This is where a little bit of precision pays off in a big way. After all the fun of planning and choosing your art, getting the measurements right is what separates a good gallery wall from a great one. It’s what makes the final result look polished and intentional.
Don't worry, you don't need to be a math whiz. A few simple decorator's tricks of the trade will guide you, giving you the confidence to hang every single piece exactly where it's meant to be.
The 57-Inch Rule and Hanging at Eye Level
Here’s the golden rule of the interior design world: hang art at eye level. It creates an immediate, natural connection between the person looking and the art itself. The industry standard for "eye level" is to position the center of your artwork (or the entire gallery arrangement) 57 inches up from the floor.
This number isn't random; it's based on the average human eye level and is the go-to measurement for galleries and museums. Following this guideline ensures your art isn't floating too high or drooping too low. It just feels right.
For a single large piece, just measure its height, divide by two, and add that number to the 57-inch mark to find where to put your nail. For a gallery wall, you’ll want to treat the whole collection as one unified piece and find its collective center point.
Getting the Spacing Just Right
When you're arranging multiple pictures, consistency is everything. Keeping the space between each frame uniform creates a clean, cohesive look that’s easy on the eyes and prevents the wall from feeling cluttered.
As a general rule, aim for 2 to 3 inches of space between each frame. This gives each piece enough room to breathe without leaving big, awkward gaps. Sticking to this simple spacing will make your entire layout feel more professional.
Pro Tools and Tricks for Flawless Accuracy
A few simple tools can make this job so much easier and more accurate. Forget trying to eyeball it—a little help goes a long way.
- A Laser Level: This is my absolute secret weapon for gallery walls. It shoots a perfectly straight line across the wall, making it foolproof to align the tops or bottoms of your frames. Seriously, it's a game-changer.
- The Toothpaste Trick: Have a frame with one of those tricky sawtooth hangers? Dab a tiny bit of toothpaste on the hook itself. When you press the frame against the wall where you want it to go, it’ll leave a perfect little mark telling you exactly where the nail belongs.
- A Good Measuring Tape: This one’s a no-brainer, but it's essential. If you're juggling measurements for your wall and your frames, a quick conversion tool can be a real lifesaver. This feet to inches converter is super handy to keep bookmarked.
It’s no surprise that personalizing our homes is a big deal. The global wall decor market hit a massive $57.43 billion in 2023 and is only expected to grow. This just shows how much we all love creating spaces that truly feel like us. You can read more about this growing market on Business Wire.
And if you're trying to fill a unique space, like that awkward wall above the stairs, thinking about a custom canvas size can help you create something that fits the dimensions perfectly. Once you get these simple measurements down, you'll be ready to hang your art with total confidence.
Hanging Your Art Securely and Damage-Free

Alright, you've planned your layout and nailed the measurements—now for the fun part. This is where your vision actually comes to life, but hanging art securely doesn't have to mean peppering your wall with permanent holes.
The secret is simply matching the right hardware to your frame's weight and your wall type. Whether you're a homeowner staring down tricky old plaster or a renter trying to protect that security deposit, there's a perfect hanging solution out there. Let's get these pictures up.
Choosing the Right Hanging Hardware
First things first, you need to know how heavy your frame is. A small, lightweight print requires something completely different than a huge, glass-fronted piece. Please don't guess this part; using the wrong hardware is the fastest way to find a crooked frame—or worse, hear a crash in the middle of the night.
- For Lightweight Frames (under 5 lbs): Damage-free adhesive strips are a renter’s absolute best friend. They’re simple to apply, hold surprisingly well, and peel off cleanly. I use them all the time for smaller photos and unframed canvas prints.
- For Medium-Weight Frames (5-20 lbs): A classic picture hanger with a small nail is your best bet. The angled hook does a great job of distributing the weight and only leaves a tiny, easily spackled pinhole behind.
- For Heavy Frames (over 20 lbs): Now it’s time to bring in the big guns. For standard drywall, you'll need a threaded wall anchor to give the screw something solid to bite into. If you have plaster walls, you'll want to pair a screw with a proper wall plug to keep the plaster from crumbling.
To make sure your art stays put and you avoid any mishaps, especially with drywall, it's worth understanding the best fixings for plasterboard walls. Taking a moment to get this right will save you a lot of headaches later.
Final Touches for a Flawless Finish
Once your hardware is in place, a few final checks will give you that professional-looking result. Getting everything perfectly level is the final piece of the puzzle. A small bubble level is non-negotiable here; just rest it on top of the frame to get that perfectly straight line.
If a frame is just a hair off, here’s a little trick I use: stick a small, self-adhesive bumper or a folded piece of painter's tape on one of the bottom corners to gently nudge it into place.
And for those who love a good DIY project, learning how to print photos on canvas gives you total control over the finished product. You can choose everything from the image quality to the canvas weight, which helps a ton when planning your hanging strategy from the start.
Pro Tip: Don't throw away those paper templates you made earlier! Tape them back on the wall, get them perfectly level, and then drive your nail or screw directly through the paper right where you marked the hanger spot. Just tear the paper away, and you’re left with a perfectly placed hook every single time.
Answering Your Lingering Picture Hanging Questions
Even with the best plan, you might still have a few nagging questions before you start hammering. That’s perfectly normal! Here are the answers to a few of the most common dilemmas people face when creating their perfect wall display.
What’s the Right Spacing for a Group of Pictures?
This is a great question, and getting it right makes all the difference. As a general rule of thumb, aim for a gap of 2 to 3 inches between each frame.
This little bit of breathing room is the sweet spot—it keeps the individual pieces distinct while making the whole arrangement look cohesive and intentional. Any closer and things can feel crowded; any further apart and the grouping starts to feel disconnected. The best way to nail this? Lay everything out on the floor first to get a real-world feel for the spacing.
How Should I Tackle a Big, Empty Wall?
A large, blank wall can feel intimidating, but I like to think of it as a golden opportunity. You've got a couple of fantastic ways to approach it.
- Go for a Salon Wall: If you love a collected, eclectic vibe, a salon-style hang is perfect. Mix up frame styles, sizes, and even the orientation of your art. The trick to keeping it from feeling like total chaos is to start with your biggest "anchor" piece slightly off-center and then build your collection out from there.
- Create a Symmetrical Grid: For a more modern, clean look, you can't go wrong with a classic grid. Using frames of the same size and style creates a powerful, unified statement that feels incredibly polished and sophisticated.
No matter which path you choose, make sure the overall scale of your art collection is big enough for the wall. You want it to feel substantial, not like a few small pictures floating in a sea of empty space.
I see this all the time: people use art that’s way too small for the wall. Trust me, it’s always better to go a little too big than too small. A larger piece looks confident and intentional, while a tiny one can feel like an afterthought.
What's the Secret to Hanging Pictures Up a Staircase?
Hanging art along a staircase is all about creating a sense of flow that follows the incline of the stairs. The goal is to create a pleasing diagonal line that draws your eye upward.
Here’s the simplest way to do it: measure a consistent height up from the front edge (the "nose") of a few key steps—say, 60 inches. Mark those spots on the wall. This gives you a guideline for the center point of each frame, ensuring your gallery wall "climbs" the stairs right alongside you. It's a simple trick that makes the final result look perfectly integrated with your home's architecture.
Ready to turn those digital photos into a stunning gallery wall? At everone prints, we help you create beautiful, high-quality canvas prints that bring your favorite memories to life. Upload your photos and start designing your custom wall art today