

how to preserve old photos: A Practical Guide
When you're ready to tackle that box of old family photos, the goal is to make sure they last for generations to come. It’s a process of careful handling, gentle cleaning, smart digitizing, and proper storage. Getting it right means protecting both the original print and creating a digital backup that will stand the test of time.
Your First Steps in Handling Heirloom Photos
Before you even think about sorting through that shoebox of family history, your first priority is setting up a safe workspace. Think of it like a clean room for your most precious memories.
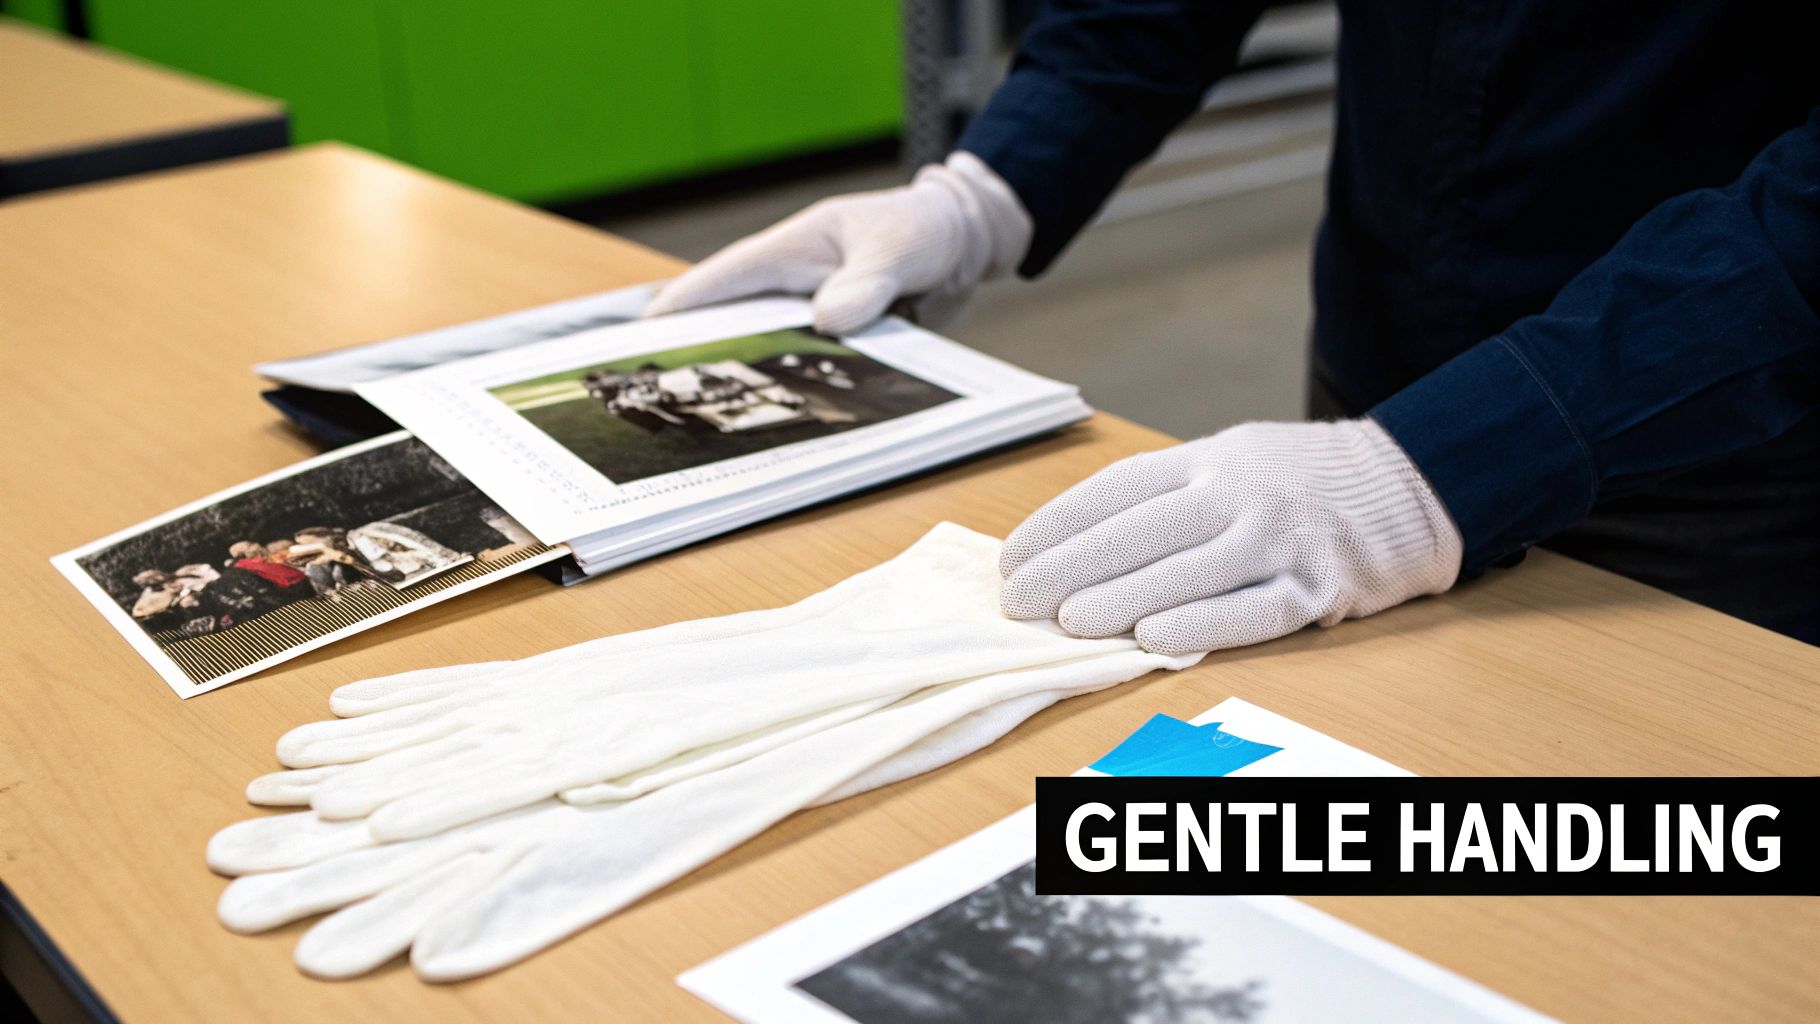
Grab a pair of soft, lint-free cotton gloves. This is non-negotiable. The oils from your fingertips can permanently damage the delicate photo emulsions over time. Next, find a large, clean, and dry table, and make sure there are absolutely no food or drinks nearby—spills are the enemy here.
Assess Your Collection First
With your safe space ready, it’s time to play detective. Don't just dive in and start reorganizing. A quick, gentle triage of your collection will help you figure out what you're dealing with and how to prioritize without feeling overwhelmed.
As you carefully look through the stack, keep an eye out for a few common issues:
- Fragility: Are any photos brittle, torn, or have a flaking surface? These are your most fragile treasures. Set them aside gently to handle individually later.
- Sticking: Photos can often get stuck to each other or to the pages of old, acidic albums. Whatever you do, don't try to peel them apart. We'll get to how to handle that challenge.
- Damage: Make a note of any photos showing signs of water spots, mold, or severe fading and discoloration. These might need a professional's touch or at least more advanced care.
This initial once-over gives you a game plan. You’ll know which photos are sturdy enough for basic handling and which ones need to be treated with extra caution.
Why all the fuss? It helps to understand what you're working with. Old photographs aren't just paper; they're a delicate sandwich of image materials, a binder layer, and a support base. Different photographic processes from the 19th and 20th centuries have their own unique vulnerabilities to decay, which is why a one-size-fits-all approach just doesn't work.
For a deeper dive, check out these additional expert tips and a comprehensive guide on preserving old photographs. This first phase is all about building confidence and making sure you don't accidentally cause more damage.
And when you're thinking ahead to digitizing, choosing the right service is key. Our guide to the best photo printing services online also has some great information on finding quality scanning options.
Handling and Cleaning Your Cherished Prints
Over the years, our most treasured photos inevitably gather a bit of dust and grime, dimming the vibrant memories they hold. But before you reach for a cloth, it's critical to understand that cleaning a photograph isn't like dusting a bookshelf. The biggest mistake I see people make is grabbing a paper towel and some Windex—a surefire way to permanently ruin a photo's delicate emulsion.
Your goal here is simple: gently remove any loose debris without scratching the surface or introducing moisture. Think of it as a careful archeological dusting, not a deep clean. This is the first, and arguably most important, hands-on step in making sure your photos last.
Your Gentle Cleaning Toolkit
First things first, let's get your supplies in order. You don't need a lot, but you do need the right things. Improvising with household items is a recipe for disaster, so stick to the list.
- A soft, natural-bristle brush: A camel or squirrel hair brush, the kind you’d find in an art supply store, is perfect. The bristles are incredibly soft and won't scratch the photo's surface like stiffer synthetic ones can.
- Canned air: Great for dislodging stubborn dust without ever having to touch the print. Just be sure to hold the can upright and spray from about 6-8 inches away. This prevents the icy propellant from blasting onto your photo and causing damage.
- Lint-free wipes or a microfiber cloth: These are for keeping your hands and workspace clean, not for wiping the photo itself. Handling photos with clean, dry hands (or better yet, cotton gloves) is non-negotiable.
Once you’re set up, lay your photo on a clean, dry surface. Take your soft brush and use light, sweeping motions, starting from the center and moving outwards. This pushes dust off the edge instead of dragging it across the entire picture. If a few specks remain, a quick puff of canned air should be all you need.
Here's the golden rule I always tell people: Less is more. The mission is simply to remove loose dust, not to scrub away the years. Getting too aggressive will only cause scratches or, even worse, lift the image right off the paper.
When to Call in a Pro
Knowing the right technique is important, but knowing when to stop is crucial. Some problems are just too risky for a DIY fix and are best left to a professional photo conservator.
It’s time to find an expert if you see any of these red flags:
- Sticky or tacky spots: This often points to degrading adhesive or a breakdown of the photo’s emulsion. Trying to wipe this will just create a smeary, irreversible mess.
- Mold or mildew: If you see fuzzy patches or discolored, web-like stains, don't touch them. You could end up spreading mold spores and causing more damage.
- Photos stuck to glass or other photos: Whatever you do, don't try to peel them apart! A professional uses controlled humidity and specialized techniques to separate them safely without tearing the image.
Running into one of these issues doesn't mean your photo is a lost cause. It just means it needs a specialist's touch. Proper cleaning is a huge part of photo preservation, but doing it safely is what ensures your memories will be around for generations to come.
Creating a Lasting Digital Archive of Your Memories
Think of digitization as the ultimate insurance policy for your family's history. Physical photos are incredibly vulnerable—to fires, floods, fading, and just the simple passage of time. Creating a digital copy is the single best thing you can do to make sure those moments are safe forever, building a bridge from the past to the future.
This isn't just a hunch; it's what professional archivists do to protect priceless historical collections. Research from sources like WebJunction shows that a staggering 70-85% of damage to old photos comes from environmental factors. Digitization sidesteps that risk completely, preserving these images for generations to come.
Choosing Your Digitization Method
You don't need a professional lab to get fantastic results. The best method really just depends on the size of your collection, the condition of the photos, and how much time you're willing to invest.
There are a few great ways to tackle this at home. Each has its own strengths, so let's break down which one might be right for you.
| Method | Best For | Pros | Cons |
|---|---|---|---|
| Flatbed Scanner | High-quality archival scans and fragile photos | Unmatched detail and color accuracy; captures the highest resolution. | Slower process; can be tedious for large collections. |
| Smartphone Scanning App | Quickly digitizing large batches of modern photos | Incredibly fast and convenient; apps like Google PhotoScan correct for glare and perspective. | Lower quality than a flatbed; not ideal for enlargements. |
| Professional Scanning Service | Huge collections or if you're short on time | Hands-off process; high-end equipment produces excellent results. | Can be expensive, especially for thousands of photos. |
For most people, a hybrid approach works best. I often recommend using a flatbed scanner for those truly irreplaceable 19th-century portraits or fragile wedding photos. Then, use a smartphone app to blaze through that shoebox full of 90s snapshots.
My personal tip? Start small. The idea of scanning your entire family history at once is overwhelming and a surefire way to burn out. Just pick one album or a single decade. Finishing that small batch will give you a huge sense of accomplishment and the motivation to keep going.
Getting the Settings Right
Before you hit "scan," taking a moment to dial in the right settings will make a world of difference in your final archive. It’s the key to turning a good scan into a great one.
First things first, make sure your photos are clean. A little bit of dust on a 4x6 print becomes a huge blemish once it's digitized.

This little guide is a great reminder: always avoid moisture and use gentle, soft tools to prep your photos. Once they're ready, let’s get your scanner configured.
-
Resolution (DPI): For standard prints, 300 DPI (Dots Per Inch) is your absolute minimum. I strongly recommend scanning at 600 DPI if you think you might ever want to make a larger print. For tiny photos, slides, or negatives, bump it up to 1200 DPI or more to capture all that detail.
-
File Format: This one is non-negotiable for archival purposes. Save your master scans as TIFF files. A TIFF is "lossless," which means no image data is thrown away during saving. It's the digital equivalent of the original negative. You can always create smaller JPEG copies from your TIFF masters for sharing online or through email.
-
Color Depth: Always scan in 24-bit color. Yes, even for your black-and-white photos! This setting ensures you capture all the rich, subtle sepia tones and grayscale gradations that give old photographs so much of their character and warmth. If you need some pointers on working with digital photo quality, our guide on how to print pictures off Instagram has some helpful tips.
Finding the Right Archival Storage Solutions
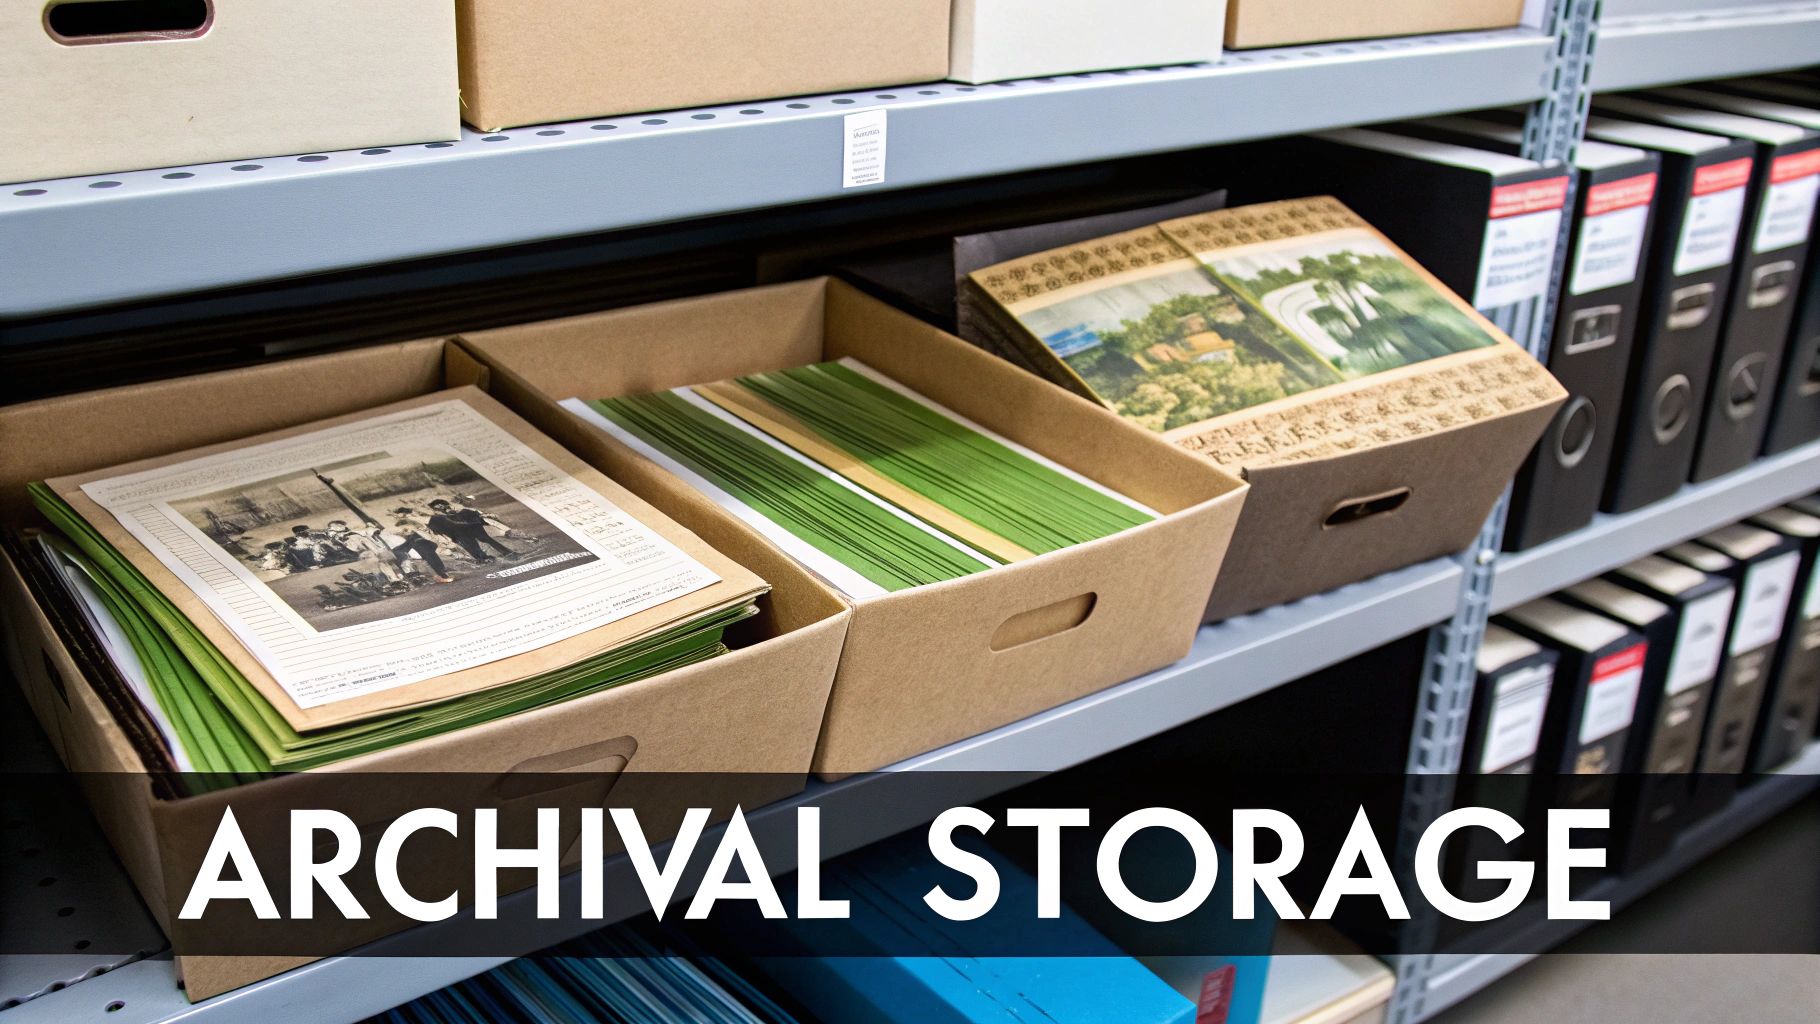
Now that your photos are clean and you have digital backups, it's time to give them a safe physical home. This step is all about archival storage, which sounds more complicated than it is. Really, all we're doing is creating a stable environment that protects your precious prints from the enemies of preservation: light, acid, and humidity.
The most important thing is choosing materials designed specifically for photos. You'll see terms like "acid-free," "lignin-free," and "photo-safe" thrown around. These aren't just fancy marketing terms—they’re your assurance that the boxes and sleeves themselves won't release chemicals that cause your photos to yellow and crumble. That old shoebox in the attic? It's literally made of materials that are actively damaging your prints over time.
This isn’t just a small detail. Conservation science tells us that a staggering 60% of historic photo deterioration is a direct result of bad storage. You can read up on this critical research from the Getty Conservation Institute. By simply choosing the right supplies, you’re tackling the single biggest threat to your family's visual history.
Selecting the Best Containers and Sleeves
Think of your storage strategy in two parts: individual protection for each photo and a secure outer box for the whole collection.
Every single important photo should get its own sleeve. This is non-negotiable. It keeps them from scratching each other and shields them from fingerprints when you (or your grandkids) handle them.
- Polyester (Mylar) Sleeves: These are the gold standard. They're crystal clear, super sturdy, and offer top-tier protection. I reserve these for the really old, fragile, or irreplaceable images, like that one-of-a-kind portrait of your great-great-grandmother.
- Polypropylene Sleeves: A fantastic, more affordable option for bulk collections. They're flexible and clear, making them perfect for sorting through those stacks of family photos from the 80s and 90s.
- Acid-Free Paper Envelopes: These are great, especially for negatives or when you want to group photos by event. Just make sure they've passed the Photographic Activity Test (PAT), which confirms they are truly inert and photo-safe.
Here's a pro-tip I learned the hard way: always label the sleeve or envelope with a soft graphite pencil before you slide the photo in. Ink from a pen can transfer or bleed onto the print over the years, creating a whole new problem.
Choosing Your Main Storage Box
Once your photos are sleeved, they need a good home. I always recommend clamshell-style boxes made from acid-free, lignin-free buffered board. These create a stable little micro-environment, protecting your collection from light, dust, and even pests.
A common mistake is packing the box too tightly. You want to leave a little bit of wiggle room so you can get photos in and out without bending or forcing them.
By taking the time to select the right materials, you’re not just storing photos—you're building a safe haven for your family's legacy. And when you're ready to bring some of those memories out for display, getting the print quality right is just as important. For that, take a look at our guide on finding the best paper for photo printing to make sure your new prints will last.
Controlling the Environment Where Your Photos Live
You’ve got the right acid-free box, which is a fantastic start. But where you put that box is just as crucial for keeping your photos safe for the long haul. Think of it like creating a mini-climate for your most precious memories.
Three silent enemies are constantly trying to ruin your photos: light, temperature, and humidity. Get these under control, and you’ll stop fading, yellowing, and even mold in their tracks. It's less about finding a "perfect" spot and more about avoiding the really, really bad ones.
The Three Silent Enemies of Photographs
Let's get to know the culprits. Each one can cause unique and, unfortunately, irreversible damage if you let it.
- Light: Sunlight is the most obvious villain. Its UV rays act like a slow-motion bleach, breaking down the dyes in your photos and causing them to fade. This is why you should never, ever hang an original heirloom photo in a sunny room. Even bright indoor lights can cause damage over time.
- Temperature: Heat is an accelerator for chemical decay. For every 10°F increase in temperature, the rate of deterioration basically doubles. This is exactly why a hot attic is probably the single worst place to store your family photos.
- Humidity: This one is a balancing act. Too much moisture in the air invites mold and can make photos stick together in a gooey mess. On the other hand, air that's too dry can make prints brittle and prone to cracking.
What you're aiming for is a storage spot that is cool, dark, dry, and, most importantly, stable. Big swings in temperature and humidity are brutal on photos, causing them to constantly expand and contract, which leads to physical damage over the years.
A great rule of thumb is to aim for a temperature below 70°F (21°C) and relative humidity between 30% and 40%. Honestly, though, consistency is your best friend. A stable environment is way better than one that hits the perfect numbers but fluctuates wildly.
Finding the Best Storage Spot in Your Home
So, where is this magical, photo-safe location? I’ll give you a hint: it’s almost certainly not the attic or the basement. These areas suffer from the most extreme temperature and humidity swings in any house.
Instead, start looking for a spot inside your main living space.
Good options include:
- An interior closet in a hallway or bedroom.
- Under a bed in a room that's heated and cooled year-round.
- Inside a cabinet or a set of drawers that isn't up against an outside wall.
These spots are buffered from the extremes of the outdoors, offering a much more stable climate. And when you're ready to display some of your favorite memories, our guide on how to put posters on walls has some great tips for showcasing prints without damaging them.
If you want to get serious about moisture control, you can find some great professional tips for controlling humidity in your home that will help you prevent warping and mold. For just a few bucks, you can grab a digital thermometer/hygrometer from any hardware store to monitor your chosen spot. It's a small investment that offers huge peace of mind.
Got a Photo Preservation Puzzle? Let's Solve It
As you start sorting through your family's photographic history, you're bound to hit a few snags. It happens to everyone. You might find a stack of prints melded into a single block or an old album holding your memories hostage. These moments can be a little scary, but don't worry. Let's walk through some of the most common problems and figure out the safest way forward.
What Do I Do If Photos Are Stuck Together or to Glass?
Okay, this is probably the most heart-stopping issue you'll face. You find two amazing photos fused together, and your first instinct is to just... pull. Resist that urge! Forcing them apart is the quickest way to rip the delicate emulsion right off, taking a piece of your grandma's face with it.
When prints are stuck, it’s usually because moisture has reactivated the gelatin in the paper, essentially gluing them together. If a photo is stuck to the glass in a frame, the situation is even more precarious, as a chemical bond may have formed between the image and the glass.
Honestly, the safest move here is to consult a professional photo conservator. The risk of ruining them at home is just too high. If you want to do something, the best first step is to scan the photo through the glass. This at least gives you a high-quality digital backup before you seek expert help for the physical print.
Is It a Good Idea to Laminate Old Photos for Protection?
This one's easy: a hard no. It might seem like you're encasing them in a protective shield, but lamination is a one-way street to destruction. The process uses intense heat and adhesives that will literally cook your photograph and cause permanent, irreversible damage. Plus, the chemicals in the lamination plastic will make the photo deteriorate even faster over time.
Instead of laminating, do this:
- Slip the photo into an archival-quality sleeve. Look for materials like polyester (often sold as Mylar) or polypropylene.
- These sleeves provide fantastic protection from fingerprints, dust, and moisture.
- Most importantly, they shield the print without changing it, so you can easily take it out whenever you need to.
Think of an archival sleeve as a safe, cozy house for your photo. Lamination is a tomb. One preserves your memory, while the other seals its fate.
How Can I Safely Flatten Curled Photos?
Curling is super common. It's usually a reaction to shifting humidity levels, which causes the paper fibers to tighten up. For a photo with just a gentle curve, you can often flatten it out yourself.
First, place the print inside a protective archival sleeve to prevent scratches. Lay it on a clean, flat table and cover it with a piece of archival mat board to spread the pressure out evenly. Then, stack a few heavy books on top. Give it a few weeks—the slow, steady pressure should help the photo relax and flatten.
But what if a photo is rolled up tight or feels really brittle? Don't use this method, as you risk cracking it. For those truly fragile heirlooms, a professional can use a special humidification chamber to gently relax the paper before flattening it. It's a much safer bet for irreplaceable images.
How Should I Get Photos Out of Those Old Sticky Albums?
Ah, the infamous "magnetic" photo album. The one with the sticky pages and the clear plastic sheet? Those are notorious photo-killers. The adhesive used is incredibly acidic and only gets worse with age, leaving photos yellowed and practically cemented to the page.
If you're feeling brave, you can try a rescue mission. Gently try lifting a corner of a photo with something very thin and non-abrasive, like a plastic micro-spatula or even a length of dental floss. Try to slide it underneath the print with zero force. If you feel any resistance at all, stop. Some people have had a little luck carefully warming the page with a hairdryer on its lowest setting, held far away, to soften the glue. But be warned: this is risky and can easily damage the photo.
When they just won't budge, the best thing to do is scan the entire album page. That way, you'll have a digital copy of every photo, safe from the sticky goo that's trying to destroy them.
Ready to turn those carefully preserved memories into beautiful art for your home? At everone prints, we specialize in creating high-quality, custom canvas prints and posters from your favorite photos. Upload your image today and create a keepsake that will last a lifetime.