

10 Creative Ideas for Photo Gallery Wall Perfection in 2025
That blank wall in your home is more than just empty space; it's a canvas waiting to tell your story. A photo gallery wall is one of the most personal and impactful ways to infuse your home with personality, turning cherished memories of family, pets, and travels into a stunning visual narrative. But where do you begin? The options can feel overwhelming, from sleek, minimalist grids to eclectic, bohemian mixes that blend photos with other art.
This guide is designed to cut through the noise and provide clear, actionable ideas for a photo gallery wall. We'll move beyond generic advice and dive into 10 distinct layouts and themes, each with practical steps to help you curate, arrange, and hang your favorite moments with confidence and style. As you plan your display, it's also helpful to consider how your choices fit into the bigger picture of your home's environment. Thinking about materials and placement can align your project with broader sustainable interior design principles for a space that feels as good as it looks.
Whether you're decorating a new home, gifting a personalized print, or simply looking to refresh your space, you'll find the inspiration you need right here. Let’s get started and turn those digital photos into a tangible, beautiful centerpiece.
1. The Grid Layout Gallery Wall
If you crave order and a clean, polished look, the grid layout is one of the most satisfying ideas for a photo gallery wall. This approach arranges your photos in a perfectly symmetrical pattern, with equal spacing between each frame, creating a sense of calm and intention. It's a fantastic choice for modern, minimalist, or transitional interiors where structure and simplicity are key.

This method transforms a collection of individual photos into a single, cohesive piece of art. Imagine a series of black-and-white family portraits above a sofa or a vibrant grid of travel photos brightening up a hallway. The uniformity of the grid allows the photos themselves to be the stars of the show.
How to Achieve the Perfect Grid
Precision is your best friend here. While it might seem intimidating, a few simple tools will make the process a breeze.
- Map It Out First: Before you even think about hammering a nail, lay your framed photos on the floor to finalize the arrangement.
- Create a Template: Use painter's tape to outline the perimeter of your entire gallery wall on the wall itself. Then, tape out the position of each individual frame. This lets you visualize the final result and make adjustments easily.
- Use a Laser Level: For perfectly straight lines, a laser level is a game-changer. It ensures every row and column is flawlessly aligned.
- Consistent Spacing is Key: Aim for 2-3 inches of space between each frame. This creates visual breathing room without making the gallery feel sparse.
2. The Eclectic/Salon Wall
For those who love a more organic, collected-over-time aesthetic, the eclectic salon wall is one of the most expressive ideas for a photo gallery wall. This approach throws symmetry out the window, embracing a free-form arrangement of photos, prints, and art in various sizes, frame styles, and orientations. It creates a vibrant, personal, and gallery-like atmosphere, perfect for bohemian, artistic, or traditional homes with a modern twist.
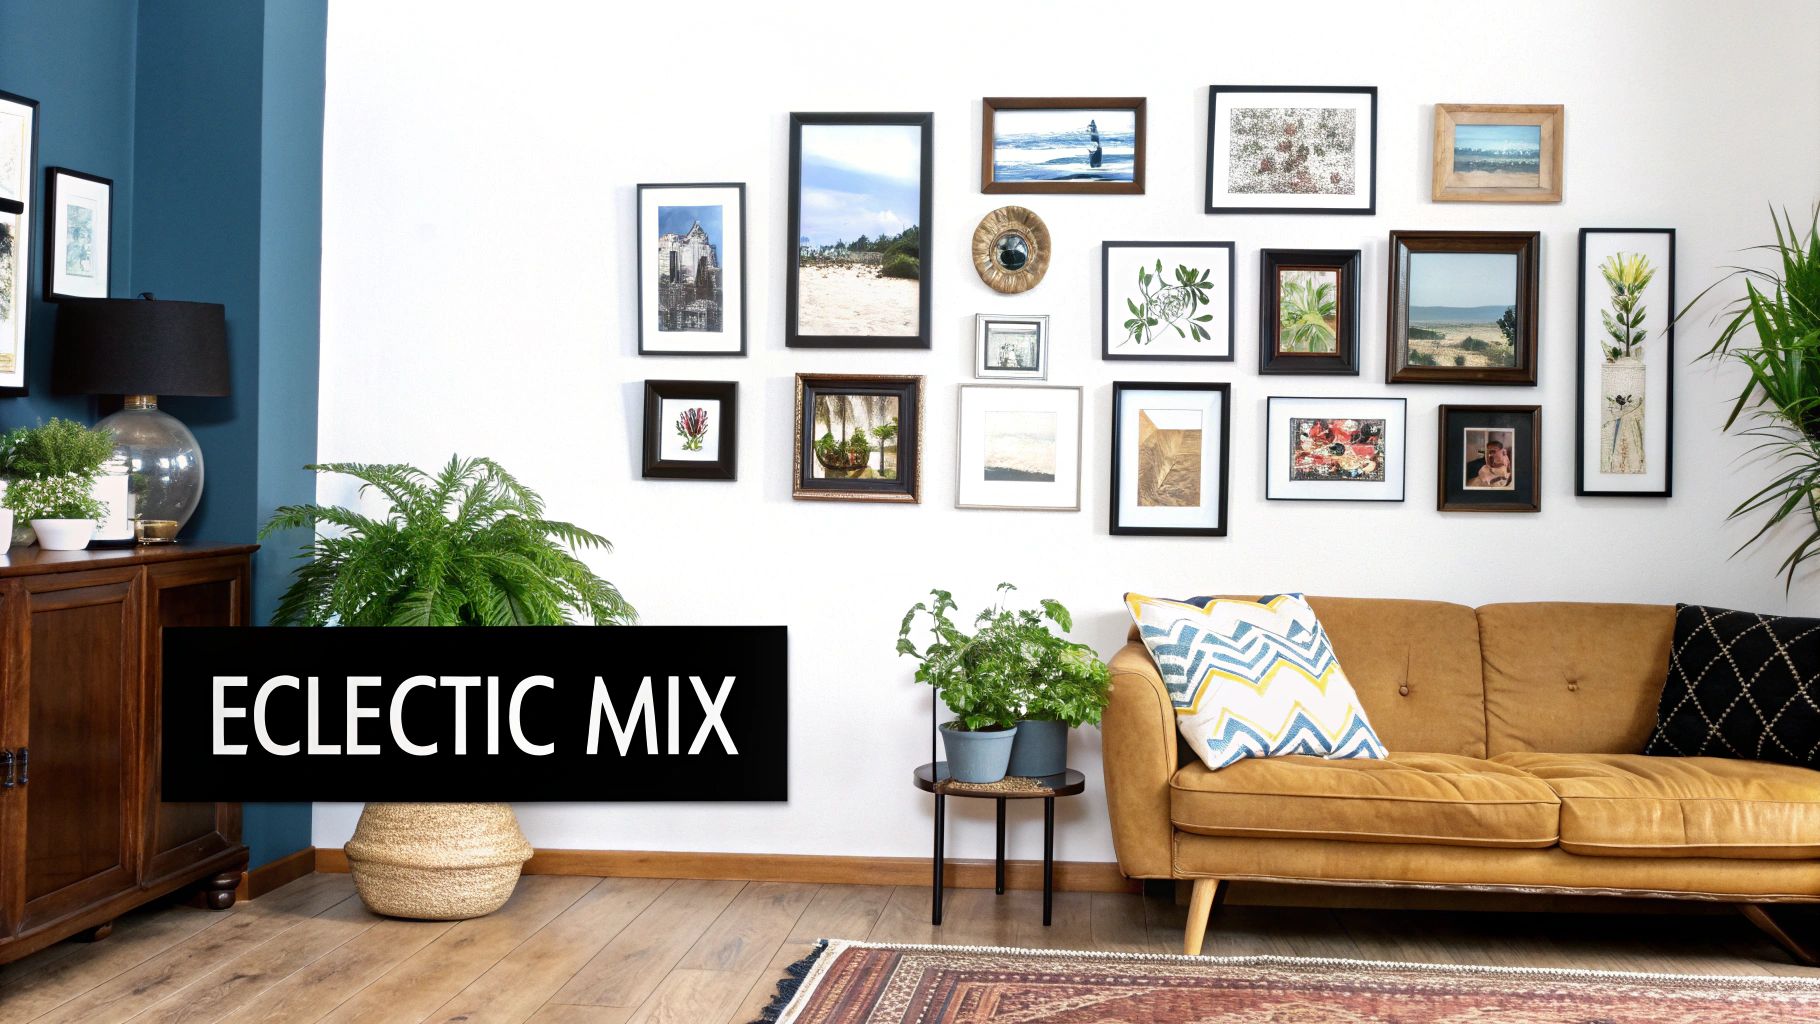
This style tells a story, turning your wall into a visual diary of your life and tastes. Imagine a mix of family photos, vintage postcards, small mirrors, and children’s artwork all clustered together over a credenza or climbing up a staircase. The charm of the eclectic wall lies in its controlled chaos, where every piece contributes to a larger, deeply personal composition.
How to Master the Eclectic Look
Achieving a beautifully balanced eclectic wall is an art, not a science. The goal is to make it look effortless, even with careful planning.
- Plan on the Floor: Before making any holes, arrange all your pieces on the floor. This allows you to play with the layout, find a balance you love, and see how different elements interact.
- Establish an Anchor: Start with your largest piece of art or your favorite photo. Place it slightly off-center to create a natural focal point that the other pieces can gravitate around.
- Vary the Spacing: Unlike the grid, spacing can be inconsistent. Aim for a relatively consistent distance of 1-4 inches between frames, but don't be afraid to cluster some closer together than others for a dynamic effect.
- Unify with Color: To prevent the wall from looking too chaotic, create a common thread. This could be a consistent color in all the photos, a recurring frame material like gold or natural wood, or a similar mat color.
3. The Monochromatic/Single-Color Theme Gallery Wall
For those who love a clean, curated aesthetic but want more flexibility than a rigid grid, the monochromatic gallery wall is a perfect solution. This idea for a photo gallery wall centers on one unifying element: the color of the frames. By using all black, all white, or all natural wood frames, you create a cohesive look that allows a diverse collection of photos and art to feel like a single, intentional installation.
This approach is particularly effective in Scandinavian and minimalist designs, where simplicity and harmony are paramount. Imagine a mix of family photos, abstract art, and kids’ drawings all tied together beautifully by matching white frames against a soft gray wall. The frame consistency provides the structure, giving you the freedom to mix and match the content within.
How to Create a Cohesive Single-Color Gallery
Choosing the right frame color is the key to making this style work in your space. This is where your room's existing palette comes into play.
- Choose Your Frame Color: Black frames offer a classic, bold contrast that works nearly anywhere. White frames feel bright and airy, perfect for modern spaces. Natural wood adds organic warmth, while gold or brass lends a touch of glamour.
- Complement Your Walls: The frame color should stand out from or complement your wall color. For a deep dive into color theory, exploring resources on mastering home design color can provide valuable insights.
- Buy in Bulk: To ensure a perfect match, purchase your frames from the same retailer at the same time. This is also a great way to save money on your project.
- Vary the Sizes: The magic of this method is its flexibility. Use a variety of frame sizes and orientations (portrait and landscape) to create a dynamic, visually interesting layout.
4. The Timeline/Chronological Gallery Wall
For a truly personal and emotional display, the timeline gallery wall is one of the most heartwarming ideas for a photo gallery wall. This approach tells a story by arranging photos in chronological order, creating a visual narrative of growth, love, or adventure. It’s perfect for hallways, staircases, or family rooms where you can follow the journey from past to present.
This method turns your wall into a living history book. Imagine tracking your children's growth from newborns to teenagers, showcasing relationship milestones from the first date to the wedding day, or documenting a series of yearly family vacations. The linear progression adds a powerful layer of meaning that guests and family members will love to explore.
How to Create Your Visual Story
Building a timeline is about highlighting progression and creating a natural flow. The goal is to make the story easy to follow and emotionally resonant.
- Plan for the Future: When mapping out your timeline, be sure to leave empty space at the end. This thoughtful detail allows you to add new memories as they happen without having to rearrange the entire wall.
- Establish a Clear Flow: Arrange your photos from left to right or top to bottom, mimicking the way we naturally read. This makes the chronological order intuitive and easy for anyone to follow.
- Add Context with Labels: Consider adding small, subtle labels with dates or years beneath each frame. This simple touch adds clarity and reinforces the timeline concept, making the story even more compelling.
- Use Consistent Framing: Using the same style or color of frame for every photo helps unify the display. This consistency ensures the focus remains on the evolving story within the pictures, which is especially powerful for a family gallery wall.
5. The Floating Frame/Minimalist Line Gallery Wall
For a truly contemporary and sophisticated look, the floating frame gallery wall is one of the most elegant ideas for a photo gallery wall. This minimalist approach uses thin frames or special "floating" frames that make your photos appear suspended against the wall, creating an airy, uncluttered, and high-end feel. It’s perfect for modern homes, art-inspired spaces, and anyone who wants their photography to be the undisputed focal point.
This style mimics the clean presentation seen in high-end art galleries and museums, giving your personal photos a professional and curated quality. By minimizing the visual weight of the frames, you allow the composition, color, and subject of each image to shine. The generous spacing between pieces turns the wall itself into part of the overall design.
How to Create a Minimalist Masterpiece
Achieving this look is all about precision and restraint. The goal is to make a statement through simplicity.
- Choose High-Impact Photos: Since the framing is minimal, select high-quality, powerful images that can stand on their own.
- Embrace Generous Spacing: Unlike a dense grid, this style thrives on negative space. Aim for 6-12 inches between each frame to let each photo breathe.
- Use Proper Hardware: To get the authentic "floating" effect, use specialized floating frame hardware or invisible wires that hide the mounting system from view.
- Keep it at Eye Level: Hang the center of your arrangement at approximately 57-60 inches from the floor, which is the standard eye level for galleries. This ensures the art is viewed comfortably. For more inspiration, you can find a variety of stunning photo wall displays on everone.shop.
6. The Color-Blocked/Themed Gallery Wall
For those who see the world in vibrant hues, the color-blocked gallery wall is one of the most visually stunning ideas for a photo gallery wall. This approach curates photos based on a dominant color palette, transforming your collection into a cohesive and artistic statement. It's perfect for creating a specific mood, whether it's the calming blues of ocean photography or the warm oranges of a sunset-themed display.
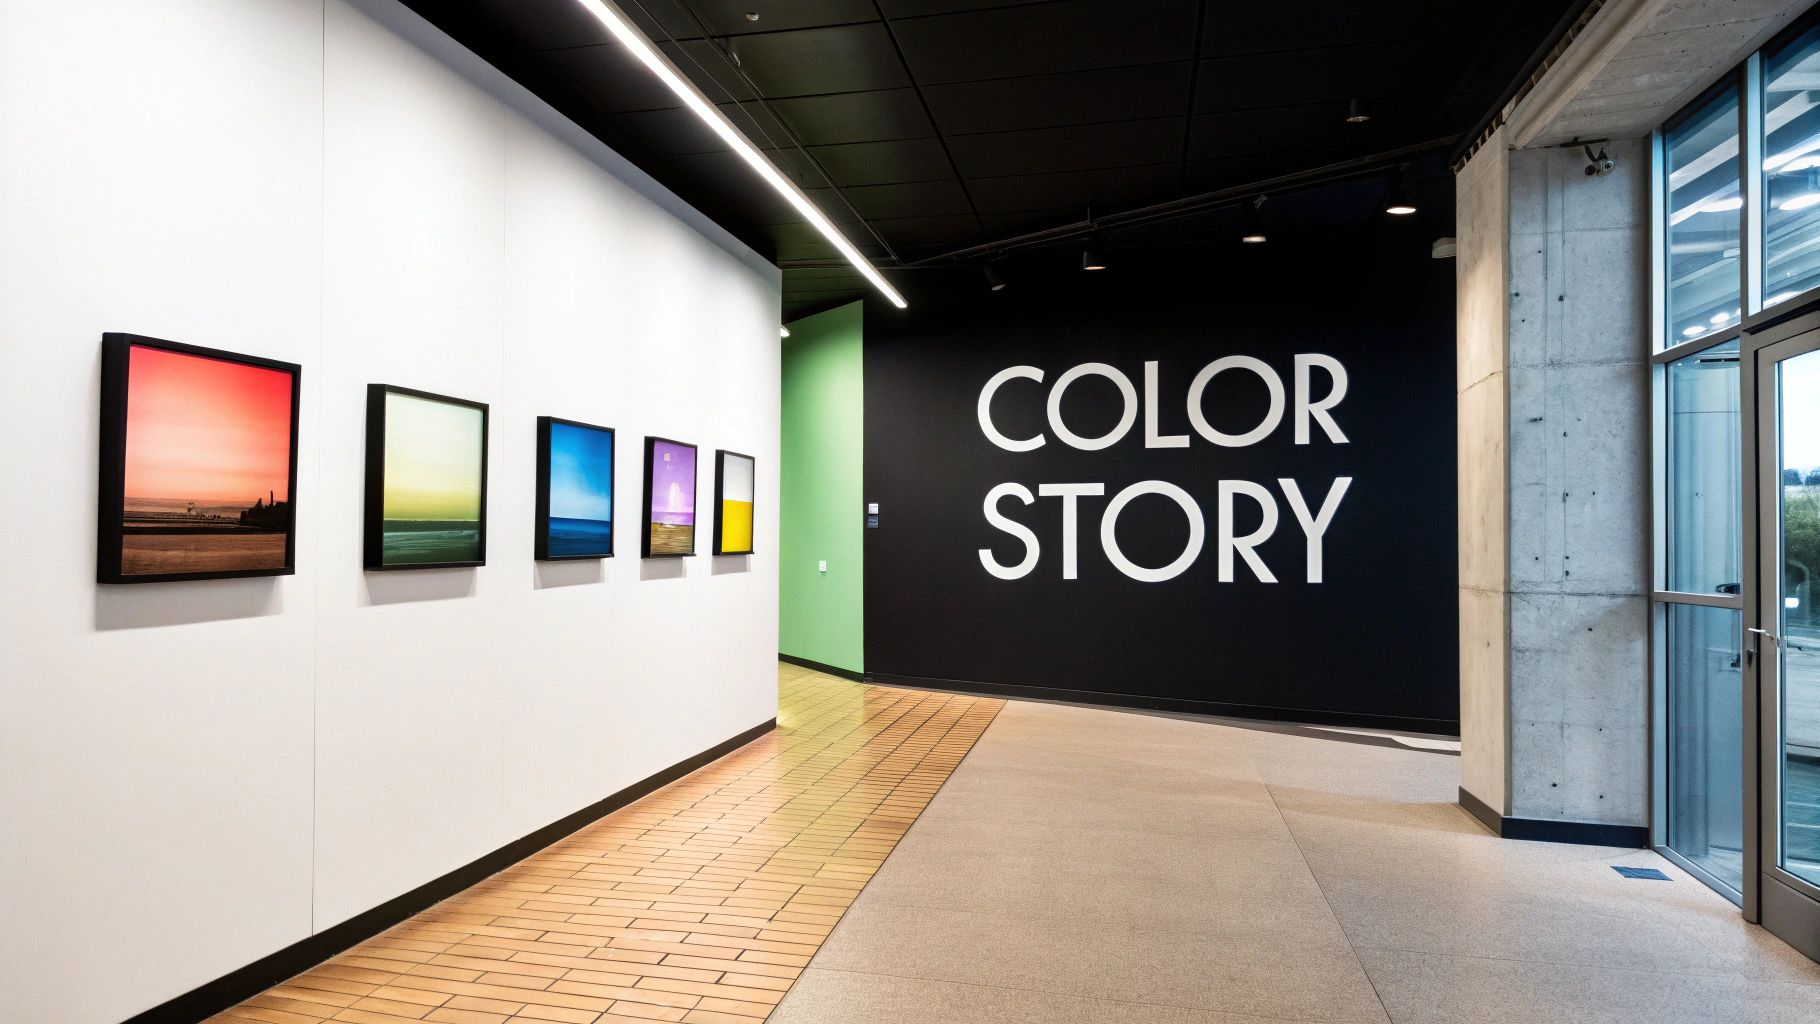
This method goes beyond just the subject of the photos and focuses on the emotional impact of color. Imagine a botanical gallery featuring rich greens and earthy browns, or an urban collection of black-and-white prints with a single, repeating accent color like yellow or red. The result is a powerful visual narrative that feels both intentional and deeply personal.
How to Create a Color Story
Bringing a color-themed gallery to life is all about planning and curation. The goal is to make the colors flow, not clash.
- Create a Mood Board: Before you start printing, gather digital versions of your photos and use a tool like Canva or Photoshop to see how they look together. This helps you finalize your color palette.
- Play with Gradients: Arrange your photos to create a subtle color gradient. You can transition from light blues to deep indigos, or from soft pinks to fiery oranges, for a dynamic effect.
- Vary Your Frames: Don't be afraid to mix and match frame colors. A combination of neutral frames (white, black, wood) with a few frames that match your dominant color can add depth and interest.
- Mind Your Wall Color: The color of your wall serves as the canvas. A neutral wall will make your photo colors pop, while a complementary colored wall can create a rich, immersive experience.
7. The Collage/Polaroid-Inspired Gallery Wall
For a gallery wall that feels personal, spontaneous, and full of life, the collage or Polaroid-inspired style is a fantastic choice. This approach ditches formal rules for a more organic, layered look that mimics a physical mood board or a collection of snapshots pinned up over time. It’s perfect for capturing a youthful, eclectic, or nostalgic vibe in bedrooms, home offices, or creative studios.
This method celebrates imperfection and personality, making it one of the most freeing ideas for a photo gallery wall. Think of it as a living scrapbook on your wall, featuring candid moments, inside jokes, and cherished memories. The charm is in its deliberate lack of structure, creating a display that feels both authentic and artistically chaotic.
How to Create a Playful Collage
The key is to make the arrangement feel intentionally casual, not just messy. A few guidelines can help you master this carefree look.
- Mix and Match: Combine framed prints with unframed photos, postcards, and even ticket stubs. Use clips and string lights for added texture and dimension.
- Embrace Overlapping: Don't be afraid to let photos and frames overlap slightly. This creates depth and enhances the collage effect. Start with larger pieces and layer smaller ones on top.
- Add Personal Touches: Write dates, locations, or little notes directly on the matting or below the photos to capture the Polaroid feel.
- Unify with Color: To keep the look cohesive, stick to a loose color palette. This could mean using all black-and-white photos, pictures with a similar filter, or frames in a consistent color family. Printing photos directly from your favorite social media feed is a great way to ensure a consistent aesthetic. You can find out more about printing photos from Instagram to get started.
8. The Symmetrical/Paired Gallery Wall
For those who appreciate balance and a touch of formal elegance, the symmetrical gallery wall offers a beautifully structured approach. This design creates a mirror-image effect by arranging matching or complementary photos in pairs across a central axis, either vertical or horizontal. It’s an ideal choice for bringing a sense of order and sophisticated harmony to a space, especially in traditional or formal interiors.
This method is particularly effective when used to flank an existing architectural feature like a fireplace, doorway, or large window. Imagine two vertical rows of identically framed photos on either side of a grand mirror in an entryway, creating an immediate sense of grandeur and intention. The result is a calm, centered, and visually pleasing display that feels both classic and deliberate.
How to Achieve Perfect Symmetry
Balance is the goal, and careful planning is how you get there. This is one of the more formal ideas for a photo gallery wall, and precision makes all the difference.
- Establish a Center Line: Use a laser level or painter's tape to mark the central axis of your arrangement. This is your guide for creating the mirror image.
- Choose Complementary Pairs: Select photos that are similar in subject matter, color palette, or orientation. Using identical frames for each pair is crucial for a cohesive look.
- Measure Meticulously: Ensure the spacing between frames, and from each frame to the center line, is exactly the same on both sides. A tape measure is your best tool here.
- Start from the Center: Hang the pieces closest to the central axis first and work your way outwards to maintain perfect balance throughout the installation process.
9. The Mixed Media/Artwork Mashup Gallery Wall
For those who see their walls as a canvas for personal expression, the mixed media mashup is one of the most dynamic ideas for a photo gallery wall. This approach goes beyond just photography, inviting other art forms like paintings, prints, textiles, and even sentimental objects into the fold. It creates a rich, layered display that tells a deeper story about your tastes, travels, and life experiences.
This style transforms a simple photo arrangement into a curated, personal art collection. Imagine your favorite family vacation photo nestled between an abstract print you love and a small, woven tapestry. The combination of textures, colors, and subjects makes the wall feel alive and truly unique, reflecting a well-rounded and artistic personality.
How to Curate Your Collection
Creating a beautiful mixed media wall is all about balance and personal connection. It’s less about rigid rules and more about creating a harmonious conversation between different pieces.
- Find a Common Thread: Unify your diverse collection with a consistent color palette, a recurring theme (like nature or travel), or a similar frame style. This prevents the display from looking chaotic.
- Vary Textures and Shapes: Mix rectangular framed photos with round mirrors, canvas paintings, or framed textiles. This adds visual weight and keeps the eye moving across the display.
- Balance Your Pieces: Don't cluster all the large items together. Distribute your "hero" pieces (the largest or boldest items) evenly throughout the arrangement and fill in the gaps with smaller works.
- Anchor with Photos: Use your most cherished photographs as the emotional core of the gallery. Build the artwork and other media around them to complement and enhance their story.
10. The Statement/Feature Wall Gallery Wall
When you want to go beyond simple decoration and make a bold, unforgettable impact, the statement gallery wall is one of the most powerful ideas for a photo gallery wall. This approach turns an entire wall into a canvas, creating a floor-to-ceiling or densely packed focal point that defines the entire room. It’s an immersive, high-impact design choice perfect for spaces with high ceilings, long hallways, or any area you want to infuse with personality and drama.
This method transforms a blank space into the heart of your home’s story. Imagine a grand staircase lined with generations of family photos or a living room feature wall showcasing your most cherished travel adventures in an eclectic mix of frames. The sheer scale and density of the arrangement command attention and turn your photo collection into a monumental piece of art.
How to Create a Stunning Feature Wall
Planning is essential for a project of this scale. A detailed approach ensures a cohesive and balanced result that looks intentional, not chaotic.
- Plan Your Layout: Before hanging anything, use painter's tape to map out the entire design on the wall. This lets you visualize the spacing and placement of each frame.
- Start from the Center: Begin by hanging your largest or most important piece in the center at eye level. Work your way outwards from there to maintain visual balance across the wall.
- Mix It Up Intentionally: Combine various frame sizes, styles, and orientations to add visual interest. To keep it cohesive, stick to a limited color palette for the frames, such as all black, all-white, or a mix of metallic and wood tones.
- Precision is Paramount: Use a laser level and measure carefully. With so many frames, even small misalignments will be noticeable. Getting the right canvas size is also crucial for such a large project; discover more about choosing the right custom canvas size to fit your vision.
10 Gallery Wall Ideas Comparison
| Gallery Style | Implementation Complexity 🔄 | Resources & Cost ⚡ | Expected Outcome ⭐📊 | Ideal Use Cases 📊 | Key Advantages ⭐ | Quick Tips 💡 |
|---|---|---|---|---|---|---|
| The Grid Layout Gallery Wall | High — precise measurements and leveling required 🔄 | Medium — matching frames, tools (laser level); moderate cost ⚡ | Clean, orderly, professional visual impact ⭐📊 | Modern/minimalist interiors, offices, hallways 📊 | Polished, space-efficient, versatile ⭐ | Use a wall template, start center, laser level |
| The Eclectic/Salon Wall | Medium — flexible but needs design sensibility 🔄 | Low–Medium — mixed frames and time for arranging; budget-friendly ⚡ | Dynamic, highly personalized, conversational ⭐📊 | Bohemian living rooms, creative spaces, eclectic homes 📊 | Forgiving, expressive, uses existing frames ⭐ | Lay frames on floor, create a focal piece, photograph plan |
| The Monochromatic/Single-Color Theme Gallery Wall | Medium — source or reframe for uniform color 🔄 | Medium–High — buy matching frames; cost varies with quality ⚡ | Cohesive, sophisticated, unified look ⭐📊 | Scandinavian/minimal spaces, galleries, hotels 📊 | Visually consistent, easy to expand, refined ⭐ | Pick frame color to complement wall, buy in bulk |
| The Timeline/Chronological Gallery Wall | Medium — requires curation and clear organization 🔄 | Low–Medium — consistent framing and labeling; modest cost ⚡ | Emotional, narrative-driven display that engages viewers ⭐📊 | Family halls, stairways, memory or milestone displays 📊 | Tells a story, easy to update and extend ⭐ | Add date labels, leave space for future additions |
| The Floating Frame/Minimalist Line Gallery Wall | High — exact spacing and quality hardware needed 🔄 | High — gallery-quality frames, specialized hardware; higher cost ⚡ | Airy, upscale, gallery-style presentation ⭐📊 | Modern living rooms, studios, museum-like displays 📊 | Emphasizes artwork, sleek and photographic ⭐ | Use 6–12" spacing, install at 57–60" eye level, hidden hardware |
| The Color-Blocked/Themed Gallery Wall | High — careful color selection and arrangement 🔄 | Medium — selective prints and possible reframing; moderate cost ⚡ | Striking, cohesive color story with strong visual punch ⭐📊 | Travel/nature collections, feature walls, modern interiors 📊 | Vibrant focal point, ties room palette together ⭐ | Create a mood board, visualize digitally, leave negative space |
| The Collage/Polaroid-Inspired Gallery Wall | Low — forgiving, informal installation 🔄 | Low — small prints, clips, string; very affordable ⚡ | Playful, intimate, nostalgic and casual display ⭐📊 | Bedrooms, dorms, youth-oriented or casual spaces 📊 | Affordable, easy to update, highly personal ⭐ | Use varied sizes, intentional overlaps, painter's tape mockup |
| The Symmetrical/Paired Gallery Wall | Medium — precise mirror-image placement needed 🔄 | Medium — matching or coordinated frames; moderate cost ⚡ | Formal, balanced, visually harmonious presentation ⭐📊 | Flanking features (windows, mirrors), entryways, living rooms 📊 | Elegant, easy to plan, naturally pleasing ⭐ | Mark center axis with tape, match tones, measure carefully |
| The Mixed Media/Artwork Mashup Gallery Wall | High — strong curation and balancing required 🔄 | High — diverse artwork sourcing and framing costs ⚡ | Curated, gallery-like collection with layered storytelling ⭐📊 | Art-forward homes, studios, eclectic or sophisticated interiors 📊 | Sophisticated, versatile, highly expressive ⭐ | Maintain a cohesive palette, create a mood board, balance weights |
| The Statement/Feature Wall Gallery Wall | Very High — large-scale planning; may need professionals 🔄 | Very High — extensive frames, time, and budget required ⚡ | Dramatic, immersive focal point with strong visual impact ⭐📊 | Lofts, commercial spaces, open-plan rooms, feature walls 📊 | Memorable, showcases large collections, high wow factor ⭐ | Plan with grid paper/software, consider lighting, consider pro install |
Bring Your Vision to Life
You've explored the clean lines of a grid layout, the free-spirited charm of an eclectic salon wall, and the narrative power of a chronological timeline. From the minimalist elegance of floating frames to the bold statement of a mixed-media mashup, we've journeyed through ten distinct and inspiring ideas for photo gallery wall designs. Each approach offers a unique canvas to tell your story, transforming blank walls into vibrant, personal chronicles of your life, family, and adventures. The true magic lies not just in the photos themselves, but in the thoughtful curation and arrangement that brings them together.
The most important takeaway is that there are no unbreakable rules. Your home is your sanctuary, and your gallery wall should be a direct reflection of your personality. Whether you crave the perfect symmetry of a paired gallery or the playful energy of a Polaroid-inspired collage, the best design is the one that brings you joy every time you look at it.
Your Actionable Next Steps
Feeling inspired? Here’s how to translate that creative spark into a tangible reality:
- Choose Your Champion: Revisit the list and select one or two styles that truly resonate with you. Don't overthink it; trust your gut instinct. Which style feels most like you?
- Curate Your Collection: Begin gathering your favorite images. This includes digital photos on your phone and computer, physical prints tucked away in boxes, and even other mementos like postcards, ticket stubs, or your child's first drawing.
- Plan Your Layout: Before a single nail hits the wall, map out your design. Use painter's tape or paper cutouts on the wall to visualize spacing and arrangement. Lay everything out on the floor and live with it for a day or two, making adjustments until it feels just right. This crucial step prevents mistakes and ensures you love the final result.
Creating a photo gallery wall is more than just a home decor project; it's an act of storytelling. It’s a dynamic, living installation that can grow and change with you. You can swap out photos to celebrate new milestones, add pieces from your travels, or rearrange the entire collection when you’re ready for a fresh look. This is your personal museum, a testament to the moments that have shaped you. Embrace the process, let your creativity flow, and build a space that is unapologetically and beautifully yours.
Ready to turn your favorite digital memories into stunning, tangible art for your gallery wall? At everone prints, we specialize in creating high-quality, archival canvas prints that make your photos look their absolute best. Let us help you bring your vision to life with vibrant colors and lasting quality. Start creating your custom prints with everone prints today!