

Creating Beautiful Photo Wall Displays Your Guide
A great photo wall doesn't just happen; it starts with a vision. This isn't just about hanging a few pictures. It's about turning a blank space into a focal point that tells your story, and this initial planning—figuring out the mood, style, and location—is easily the most important part of creating a display you'll love for years to come.
Finding Your Vision for the Perfect Photo Wall
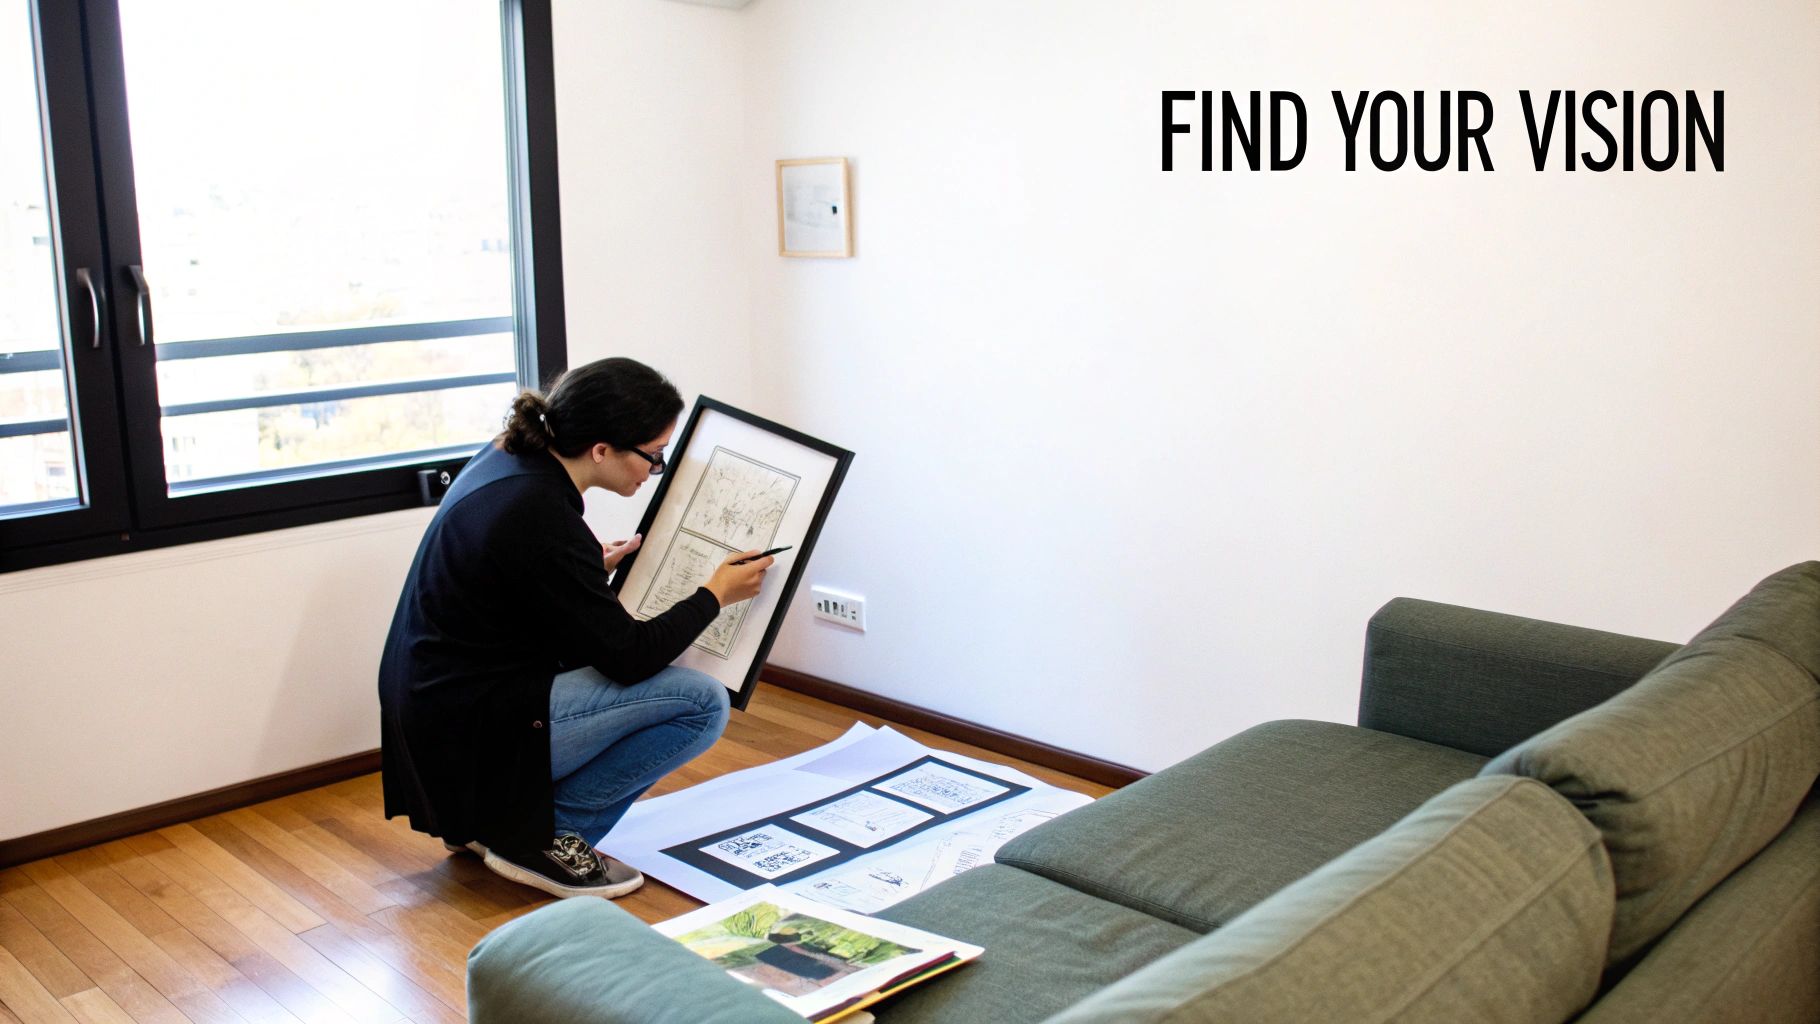
Before you even touch a hammer, take a moment to just dream. The photo walls that really capture your attention feel intentional, and that's because they started with a clear idea. You're not just filling an empty wall; you're curating a personal gallery that reflects who you are. It’s no surprise that personalized home decor is a huge trend—the global wall decor market is valued at around USD 70.5 billion for a reason! People want their homes to feel like theirs.
This whole process kicks off with finding the perfect spot. Walk around your home and really look at your walls. Is there a big, blank space above the living room sofa just begging for some personality? What about that narrow hallway that could become a timeline of your family's best moments?
Consider the Environment
Where you decide to hang your photos completely changes their impact. Keep a few key things in mind as you scout for a location:
- Natural Light: A wall that gets soft, indirect sunlight is your best friend. It’ll make your photos look vibrant without creating a nasty glare or, even worse, fading your prints over time.
- Room Flow: Your photo wall should feel like part of the room, not a loud interruption. A display arranged over a sofa or a console table can anchor the entire space. A gallery wall that travels up a staircase, on the other hand, creates a beautiful, dynamic journey.
- Wall Space: Let's be realistic about the canvas you have. A big, sprawling salon-style arrangement needs plenty of room to breathe. A tight, symmetrical grid, however, can look absolutely stunning in a smaller, more defined area.
Define Your Theme and Style
Got a spot picked out? Great. Now it's time to think about the theme. This is the narrative thread that pulls everything together, turning a random collection of snapshots into a cohesive story. Are you showing off your world travels? Celebrating family milestones? Or maybe you just want to create a tribute to all those wonderfully imperfect candid moments.
The theme you choose will naturally guide you toward a specific style. A clean grid of matching frames feels modern and organized, which is perfect for a more minimalist home. An eclectic, salon-style layout with a mix of frame sizes and finishes, however, has a much more organic, bohemian vibe. If you're looking for more inspiration, you should check out our guide on unique wall art ideas.
Deciding on a style can feel overwhelming, but it really comes down to the look you're going for. Here’s a quick breakdown of some popular options to help you choose.
Choosing Your Photo Wall Style
| Style | Best For | Key Feature |
|---|---|---|
| Grid | Modern, minimalist, or formal spaces. Looks great with black-and-white photos. | All frames are the same size and are hung in a perfect symmetrical grid. |
| Salon | Eclectic, bohemian, and creative homes. Perfect for mixing photos with other art. | A collection of different frame sizes, styles, and orientations arranged organically. |
| Linear | Hallways, above long furniture, or on picture ledges. | Frames are hung in a single horizontal or vertical line. |
| Clustered | Smaller walls or creating a tight focal point. | A group of photos arranged closely together, often centered around one larger piece. |
No matter which style you lean toward, the goal is to make it feel authentic to you.
The best photo wall displays feel personal. Don't be afraid to mix in a kid's drawing, a postcard from a memorable trip, or even an old concert ticket stub next to your professional photos. These are the little things that add texture and tell the real story.
Ultimately, this planning stage is all about setting yourself up for success. By figuring out where your display will live and what story it’s going to tell, you’re building a strong foundation for a photo wall you’ll be proud of.
Curating Your Collection of Photos and Art
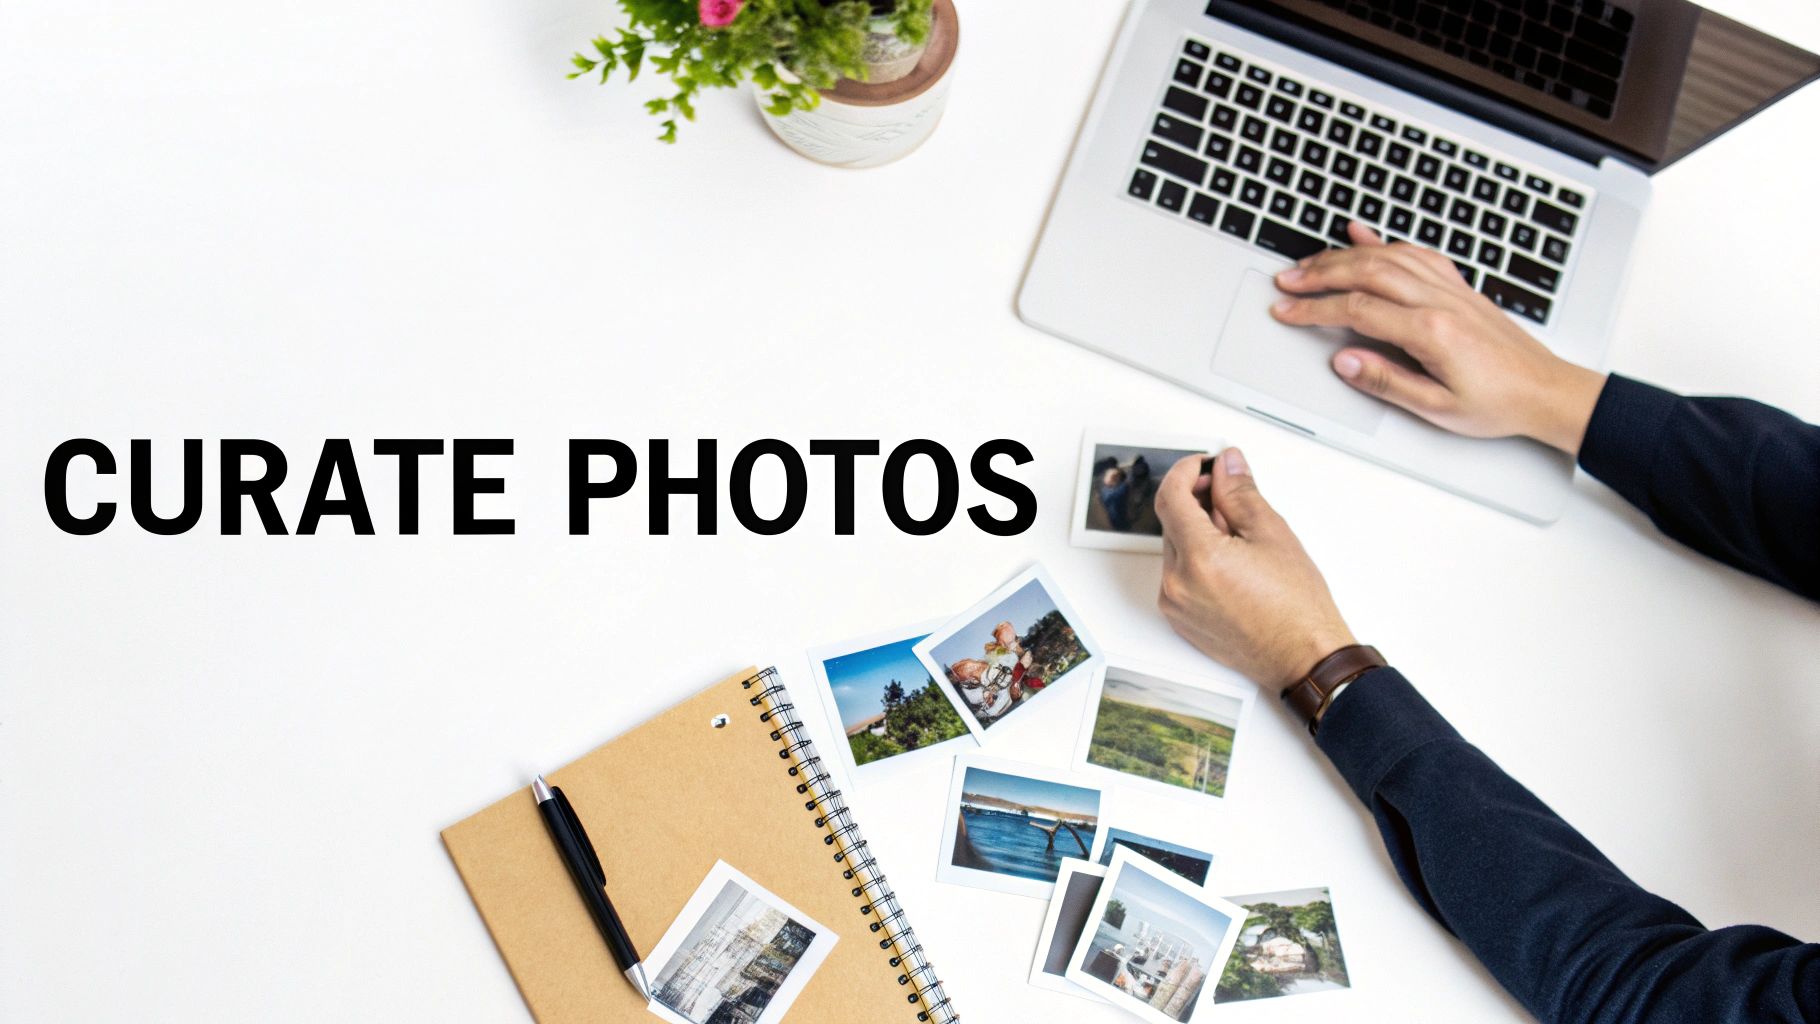
Alright, this is where your gallery wall really starts to come to life. Think of yourself as the head curator of your own personal art exhibit—it's your story, after all.
The first thing to do is go on a photo treasure hunt. Dive into your phone's camera roll, your laptop folders, and even those old physical albums. My advice? Pull out way more pictures than you think you’ll actually need. Having a big pool of options to choose from makes the final selection so much easier.
As you're sorting through everything, keep the theme you decided on earlier in mind. Try to grab a nice mix of portraits, landscapes, and those wonderfully imperfect candid moments. This is what will give your wall depth and prevent it from looking too one-dimensional.
Creating a Cohesive Look
The real magic of a stunning gallery wall isn't just picking amazing photos; it's making them all feel like they belong together. There are a few ways I love to do this.
One of the simplest tricks is to use a consistent editing filter across all your color photos. This gives them a similar tone and mood, instantly tying the whole collection together.
Another go-to method is to convert some (or all!) of your photos to black and white. It's a classic for a reason. Black and white instantly adds a timeless, artistic vibe and elegantly solves any problems with clashing colors. You could also build your collection around a central color story—maybe focusing on photos with earthy terracotta tones or cool, coastal blues.
Pro Tip: Don't be afraid to mix it up! Some of the most interesting gallery walls combine black-and-white prints with color photos. The key is finding a good balance. You could create a small cluster of black-and-white images or use them as anchor points throughout the layout.
Mind the Technical Details
Now for a crucial, but often overlooked, step. Before you fall in love with a photo for your wall, you have to check its quality. A photo that looks perfectly fine on your phone can turn into a blurry, pixelated mess when you print it larger.
When it comes to printing, image resolution is everything.
- Check the File Size: As a general rule, a bigger file size (in MB) means a better-quality image that's ready for printing.
- Zoom In: The best way to be sure is to open the photo on your computer and zoom in to 100%. If it still looks crisp and clear, you're in good shape.
- Social Media Photos: Be extra careful with pictures saved from social media. These platforms often shrink and compress images, which tanks the quality. If you're pulling from your feed, check out our guide on printing photos from Instagram for some essential tips to get the best possible prints.
Taking a few minutes to handle the curation and technical checks up front will make all the difference. It ensures your final Everone prints will look just as vibrant and beautiful as the memories themselves.
Choosing Frames That Tell Your Story
Frames are so much more than just a border around your pictures—they're the secret sauce that pulls your entire gallery wall together. The right frames can take a simple collection of photos and turn it into a curated, intentional piece of art. The big question I always get is: should I match them all, or mix them up?
There’s a strong case for both.
Using a set of identical frames, like all-black or all-white, creates a really clean, modern, and cohesive look. This approach is fantastic for symmetrical grid layouts and more formal spaces. It keeps things tidy and puts all the focus right where it belongs: on the photos themselves.
But then there's the other side of the coin—mixing different styles, materials, and textures. This is where you can really let your personality shine. Combining thin metal frames with some rustic wood and maybe even a funky ornate piece you found at a flea market creates a warm, eclectic vibe. It's the perfect recipe for a salon-style wall that feels like it has been collected over years.
Thinking Beyond the Frame Itself
The material you print your photo on plays a huge part in the final look and feel, too. It can completely change the mood of an image.
- Matte Photo Paper: This is a classic for a reason. Matte paper gives you a non-reflective, elegant finish that looks amazing in brightly lit rooms. It has a subtle, professional quality that I love.
- Canvas Prints: If you want a more artistic, textured look, canvas is an incredible choice. It adds a painterly feel to your photographs, transforming them into pieces that feel like they belong in a gallery. You can dive deeper into this style with our complete guide on printing photos on canvas.
- Metal Prints: For a really contemporary and vibrant display, you can't beat metal prints. The colors are so rich and saturated, giving your images a modern edge that really pops off the wall.
Think of it this way: your frames and print choices are the final storytellers. A simple black-and-white photo in a clean black frame feels timeless and serious. Take that same photo, print it on canvas, and pop it in a warm wood frame? It suddenly feels more rustic and approachable.
Ultimately, you want to choose frames and finishes that complement both your photos and the decor you're already living with. Don't be afraid to experiment a little to find the combination that really speaks to you.
Even with all our digital gadgets, the power of a physical photograph in your home is undeniable. It’s why traditional picture frames have remained such a cherished staple. The North American picture frame market alone was valued at USD 3.845 billion and is expected to keep growing. That tells you just how much we still value tangible memories in our homes. This enduring trend highlights just how much a well-chosen frame contributes to the emotional impact of a space. You can discover more insights about this growing market on Straits Research.
Don't Skip This Step: Mapping Out Your Perfect Photo Wall
Okay, you’ve got your photos and your frames picked out. Now for the fun part—turning that vision in your head into a real-life display on your wall. But hold on a second. The absolute secret to a gallery wall that looks amazing (and not a crooked mess) isn't about having a great "eye" for design. It's all about preparation.
Seriously, skipping this part is the #1 mistake people make, and it's why so many photo walls end up looking a little... off.
The best, most stress-free way to get it right is to map everything out before you even think about grabbing a hammer. This isn't about guesswork. It’s a super simple, hands-on trick using nothing more than some craft paper and painter’s tape. You get to see exactly how it will look and make all the little tweaks you want, commitment-free.
The No-Fail Paper Template Method
First things first, grab a roll of craft paper. Even the back of some old wrapping paper will do the trick. Lay each of your frames face down on the paper, trace around the edges with a pencil, and then cut out the shapes. Voila! You now have perfect paper stand-ins for your frames.
Now, using painter's tape (the kind that won’t peel your paint off), start sticking your paper templates onto the wall. This is your playground. Move things around, try a different configuration, step back and squint at it from across the room. Get a feel for the spacing and flow until it just feels right. This little preview is the key to avoiding those "oops" moments later.
This chart breaks down the whole process, from picking your favorite shots to choosing the right finish for your prints.
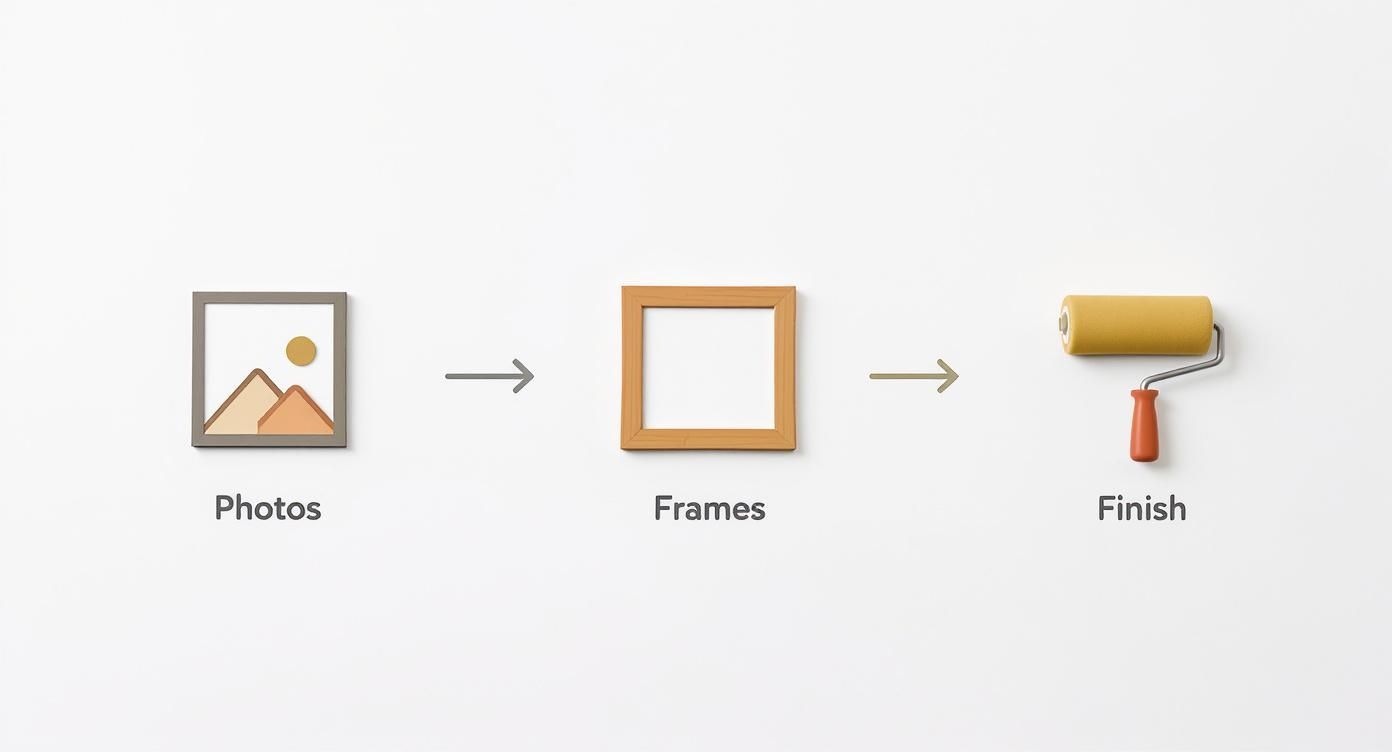
As you can see, every choice you make—from the photo itself to the frame and finish—builds on the last one to create a display that really works together.
Getting the Balance and Flow Just Right
While you're playing with your paper templates, what you're really doing is creating visual balance. This doesn’t mean everything has to be perfectly symmetrical. It just means the final arrangement should feel grounded and easy on the eyes.
A great way to get started is by placing your focal point. This is usually your biggest or most striking photo. Try putting it slightly off-center. This little trick actually encourages people’s eyes to wander and take in the whole collection, instead of just staring at the middle.
Once that main piece is up, you can build everything else out from there.
- Mind the Gaps: Try to keep the spacing between your frames consistent. A good rule of thumb is 2-3 inches. This keeps the arrangement looking like a cohesive group, not too crowded or too far apart.
- Mix It Up: Got a mix of vertical and horizontal photos? Awesome! Spread them out to create a more dynamic look. Placing a tall, skinny frame next to a wide, short one adds some really nice visual energy.
- Think in Grids: If you're going for a big, salon-style wall, look for ways to create mini-groups within the larger layout. Maybe two smaller, similar frames can be paired together to fill a tricky spot and add a bit of structure.
The whole point here is to create a display that looks intentional, not like a happy accident. Taking a few extra minutes to map it all out guarantees every single photo has its perfect place.
This planning stage is a total game-changer, especially when your gallery wall is meant to tell a story, like a growing collection of family pictures. For some specific tips on arranging those special moments, our guide to creating a beautiful family gallery wall is packed with ideas.
Once you’re 100% happy with your paper layout, you’re finally ready for the main event. You’ve done all the hard work already, so you can hang your frames with total confidence, knowing the final result is going to be exactly what you imagined.
Hanging Your Photo Wall Like a Pro
Alright, you've got your paper templates taped to the wall and everything looks just right. The finish line is so close! This is the part where all that planning and arranging really pays off. Now, let’s grab a few tools and get those pictures hung.
You don't need a massive toolbox for this. Just find a hammer, a pencil, a tape measure, and—most importantly—a good level. Having the right picture-hanging hardware is also a must.
Picking the Right Hardware for Your Walls
What your walls are made of will determine the kind of hardware you need. Getting this small detail right is the difference between a secure display and a frame that comes crashing down in the middle of the night.
- Drywall: Most homes have drywall. Standard picture-hanging hooks with those little angled nails are usually all you need. They're surprisingly strong.
- Plaster: If you're in an older home, you might have plaster walls. They’re harder and can crumble easily. Your best bet is to pre-drill a small pilot hole and use a screw with an anchor.
- Brick or Concrete: This takes a bit more elbow grease. You'll need a power drill with a masonry bit to make a hole for a wall anchor and screw.
Once you know what hardware you're working with, the rest is a breeze because of those paper templates you already have up.
Marking and Hanging with Pinpoint Accuracy
Your paper layout isn't just a pretty preview; it's the exact blueprint for where every single nail goes. This little trick is how you avoid turning your wall into Swiss cheese.
First, grab one of your frames. Measure the distance from the top of the frame down to the spot where it hangs (the sawtooth hanger or wire). Got it?
Now, go to the corresponding paper template on the wall. Measure that same distance down from the top edge of the paper and make a small pencil mark. That's it. That’s exactly where your nail or screw goes.
Do this for every single template on your wall. After all your spots are marked, you can hammer in your nails, rip away the paper guides, and start hanging your frames. As you place each one, pop your level on top to make sure it's perfectly straight.
Pro Tip: To keep frames from getting crooked over time, use two hooks for larger pieces. For smaller frames, a tiny dab of museum putty or a small piece of double-sided tape on the bottom corners works like magic.
Damage-Free Options (Hello, Renters!)
Putting holes in the wall isn't always an option, and that's totally okay. There are some great alternatives out there that give you a beautiful display without leaving a trace.
Picture ledges are a fantastic, stylish choice. You can install a shelf or two and then just lean your frames against the wall. This makes it incredibly easy to rearrange your display or swap out photos whenever you want a fresh look.
Adhesive strips are another lifesaver, especially for renters. Brands like Command have a whole range of strips designed to hold different weights. They stick firmly to the wall and come off cleanly when you're ready to move. No spackle required!
If you have a really tricky layout or some seriously heavy frames, don't be afraid to call in the experts. Using professional picture hanging services can give you peace of mind and a flawless finish, turning your vision into a reality without any of the hanging headaches.
Weaving in a Modern Twist with a Digital Display

Ready to give your gallery wall a little something extra? Let's talk about mixing the classic charm of printed photos with the cool factor of a digital frame. This isn't about replacing your prints; it's about creating a living, breathing display that keeps your favorite memories in constant, gentle rotation.
Think about it: instead of one static image, a single frame can cycle through your entire last vacation, the kids' first day of school, or all those candid shots you love but could never choose between. It adds a dynamic element that naturally draws the eye and keeps your wall from ever feeling stale.
This idea is catching on fast. The global digital cloud picture frame market was recently valued at $500 million and is expected to grow by 15% each year through 2033. People love how easy it is to update photos on the fly, especially with cloud storage and smart home tech becoming so common. You can actually find the full research on these market trends on archivemarketresearch.com.
Making Screens and Prints Play Nicely
The real trick to pulling this off is making the digital frame look like it truly belongs. You want it to feel like an intentional part of the design, not just a gadget you stuck on the wall. The goal is a cohesive look where the screen enhances your prints, not overpowers them.
Start with the frame itself. Look for a digital frame that complements the style of your other frames. Many new models offer swappable bezels in different finishes—classic wood, modern metal, you name it. Choosing one with a similar color or material is the first step to making it all feel connected.
When you get to your layout, treat the digital screen just like any other picture. Add it to your paper template process to make sure the size and placement feel right within the group. It doesn't need to be the star of the show, either. Sometimes tucking it slightly off-center makes the whole arrangement feel more natural and interesting. If you're curious about the tech that makes this possible, this Digital Sign LED: Your Ultimate Explainer Guide is a great place to start.
My favorite pro-tip: Set the slideshow transition to a slow, gentle fade. A quick, flashy slideshow can be really distracting. A slower pace feels much more elegant and allows the digital frame to blend in seamlessly, more like a piece of living art.
A Few Practical Things to Consider
Before you buy, let's think through the logistics. Digital frames need power, so you’ll need to plan its placement near an outlet. Nobody wants to see a dangling cord, so get creative! You can often hide a thin power cable behind a larger frame, a piece of furniture, or by using a paintable cord cover that blends right into your wall.
Also, think about how you'll get new photos onto it. Most modern frames are Wi-Fi enabled, letting you send pictures straight from your phone with an app or even a special email address. This is the magic of it—you can add a new memory to your wall in just a few seconds, keeping your display as current as your life.
Answering Your Top Photo Wall Questions
As you get into the nitty-gritty of planning your photo wall, you're bound to have a few questions. Trust me, I've been there. Let’s tackle some of the most common ones that come up, so you can move forward with confidence.
How High Should I Hang Everything?
This is the big one, right? The classic gallery trick is your best friend here: aim for the center of your entire photo grouping to be at eye level. For most people, that sweet spot is right around 57-60 inches off the floor. It just feels right when you walk into the room.
Now, if you're working above a sofa or a console table, the rule changes slightly. You'll want to leave about 6-8 inches of space between the top of the furniture and the bottom of your lowest frame. This little bit of breathing room makes the art feel connected to the furniture, not like it's floating away or crashing down on it.
Is It Okay to Mix Different Photo Styles?
Please do! Mixing color photos with black and white prints is one of my favorite ways to create a display that feels alive and full of personality. It adds a ton of visual texture and stops the wall from feeling too uniform or flat.
A pro tip for making this work: keep one thing consistent to tie it all together. Maybe you use the exact same frame style for every single piece, or you could create a little "cluster" of just black-and-white photos within the larger, more colorful arrangement. This creates unity in the variety.
How Can I Stop My Frames from Going Crooked?
There's nothing more maddening than spending hours getting your layout perfect, only to see a frame has tilted a few days later. For your bigger, heavier pieces, the secret is to use two hooks per frame. It’s a game-changer for stability and keeps them perfectly level.
For the smaller, lighter frames, a little dab of museum putty or a tiny piece of double-sided tape on the bottom corners is a lifesaver. It’ll hold them steady without you having to pull out the level every other day.
Feeling inspired to get those memories up on the wall? At Everone Prints, we're all about helping you create beautiful, high-quality art that you'll love for years. Start designing your custom photo wall today!