

How to Hang Posters Without a Frame
Hanging posters without a frame is one of the easiest ways to get art on your walls, and it's probably simpler than you think. The most straightforward approaches use damage-free adhesives like poster putty or double-sided tape. These are a renter's best friend. For a more intentional, stylish look, you could also go for hardware like magnetic hangers or bulldog clips.
The beauty of these solutions is that they let you display your art in minutes, all without the cost and permanence of a traditional frame.
Why Go Frame-Free for Your Posters
Let's be honest, sometimes a frame just feels like too much. Choosing to hang your posters without one opens up a ton of creative, flexible, and budget-friendly ways to decorate. It's a go-to approach for anyone looking to personalize a space without committing to permanent holes or expensive custom framing.
Whether you're sprucing up a dorm room, a temporary apartment, or you just love a clean, minimalist aesthetic, frameless methods give you the freedom to create a display that's all your own.
Benefits of Skipping the Frame
The perks go way beyond just saving a few bucks on a frame. You also get a level of flexibility and design freedom that you just can't achieve with traditional methods.
- It's Way More Affordable: Let's face it, frames can sometimes cost more than the poster itself! Frameless options like tape, putty, or clips are a fraction of the price, which means you can spend your money on what matters—more art.
- Your Walls Will Thank You: Many modern hanging solutions are designed to be removed cleanly. Think Command strips and poster putty. They come off without peeling paint or leaving nail holes, which is an absolute must if you're renting.
- It's a Clean, Minimalist Vibe: A frameless display puts all the focus right on the artwork. This creates a really clean, modern, and uncluttered look that fits perfectly with contemporary decor.
- Switch It Up Whenever You Want: Swapping out posters is a breeze. You can refresh your wall art with new finds or seasonal pieces in just a few minutes, no wrestling with a frame required.
This handy little decision tree can help you pick the right method based on how heavy your poster is.
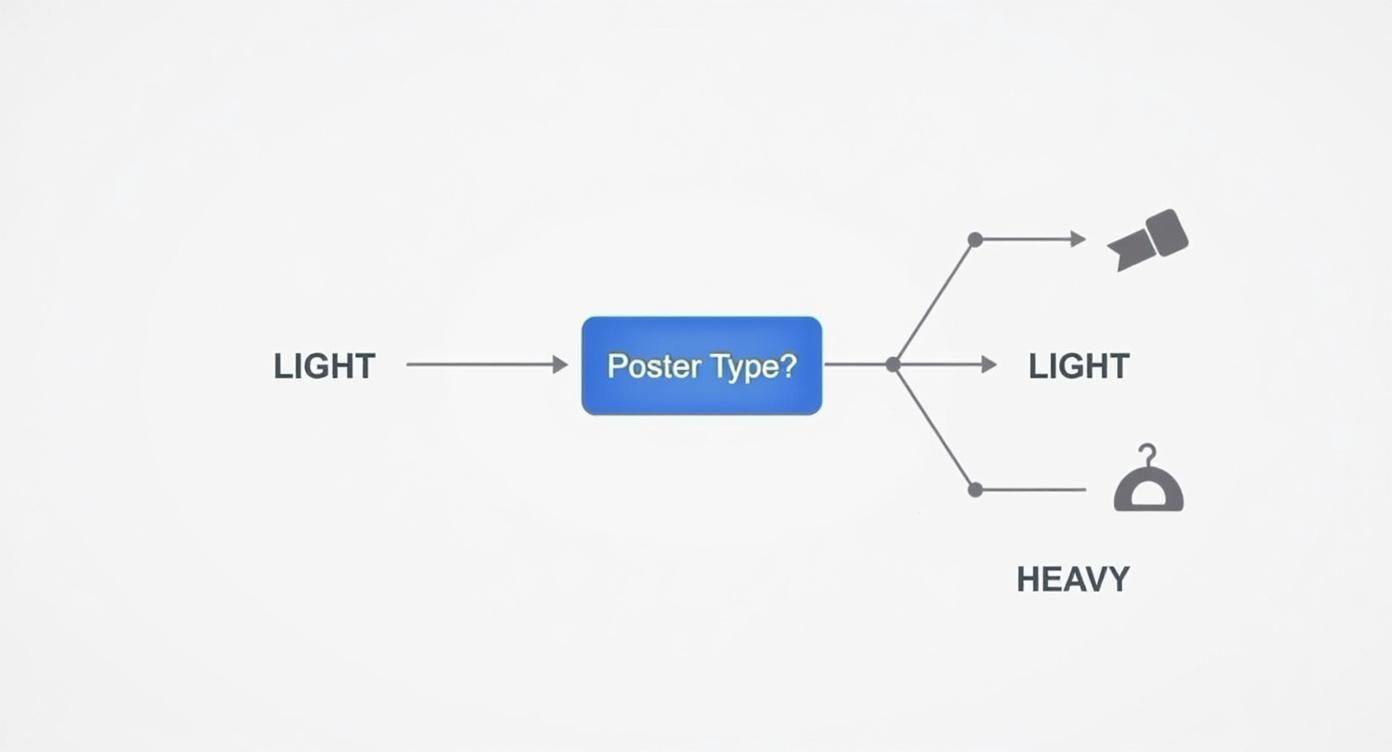
As you can see, lightweight posters give you plenty of simple adhesive options. Once you get into heavier paper or larger pieces, you'll want to look at more robust support from hangers or clips.
Comparing Frame-Free Hanging Methods at a Glance
Feeling a bit overwhelmed by the options? Don't be. Here’s a quick summary of the most popular methods, what they're best for, and what you need to know about keeping your walls and posters safe.
| Hanging Method | Best For | Wall Damage Risk | Poster Safety |
|---|---|---|---|
| Poster Putty | Lightweight posters, dorm rooms, temporary displays | Low (can leave oily stains on some walls) | Good (can damage delicate paper if not removed carefully) |
| Double-Sided Tape | Paper or laminated posters, smooth surfaces | Medium (strong tape can peel paint) | Fair (can tear paper upon removal) |
| Magnetic Hangers | Fabric, canvas, and high-quality paper posters | Low (only one small nail or adhesive strip needed) | Excellent (magnets hold paper without piercing it) |
| Bulldog/Binder Clips | Casual, industrial, or gallery wall styles | Low (requires small nails or thumbtacks) | Good (clips grip firmly but can leave imprints) |
Each method has its place, and the best choice really comes down to your specific poster and wall type. A little planning goes a long way in making sure both your art and your security deposit stay intact!
Once you've mastered the art of hanging posters without a frame, you might even get inspired to create your own custom art. Our guide on how to turn pictures into posters walks you through the process, giving you an easy way to personalize your space even more. And if you're on the hunt for new pieces, you can find a huge variety of high-quality online posters to fit any style you can imagine.
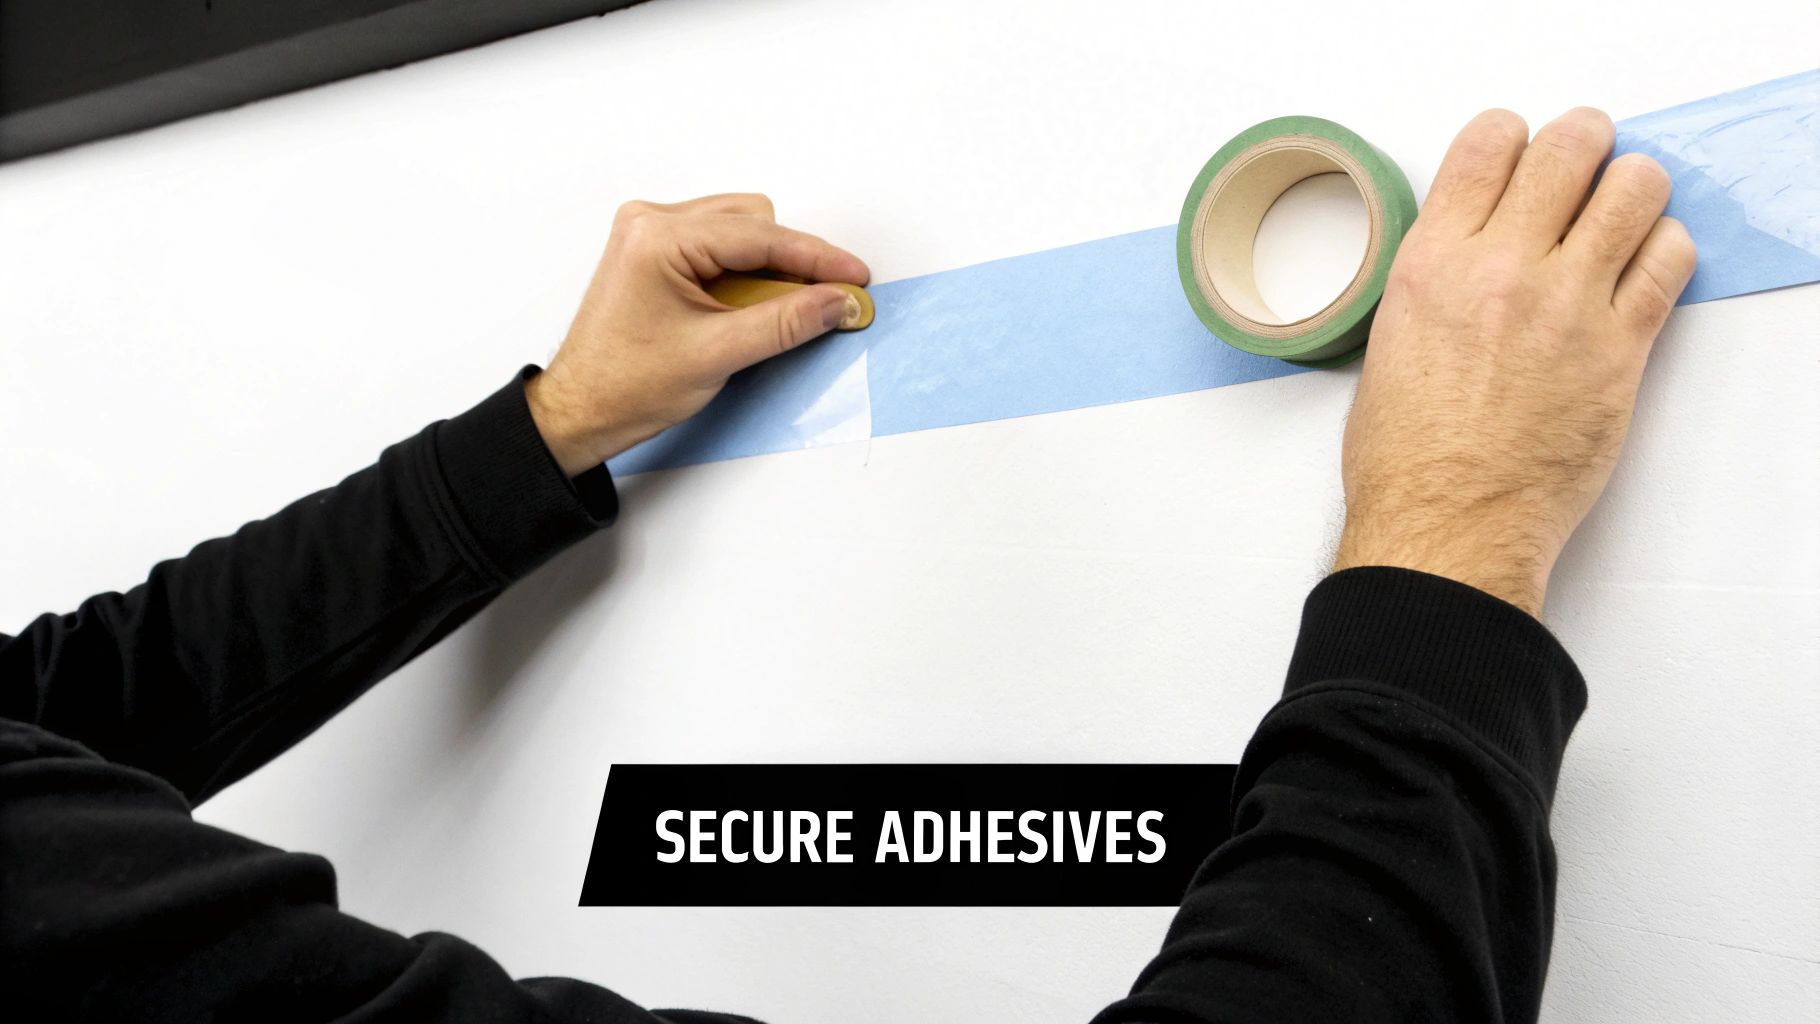
Using Tapes and Adhesives for a Secure Hold
When you think about hanging posters without frames, tape is probably the first thing that pops into your head. But let's be clear—we're not talking about that flimsy office tape that gives up and lets your poster curl after a week. There's a whole world of smart, reliable adhesives designed to hold your art securely while keeping your walls looking brand new.
Choosing the right adhesive is a bit like picking the perfect tool for a job. It really all depends on the situation. Hanging a lightweight, glossy concert poster in a dry bedroom is a totally different ballgame than displaying a delicate art print in a potentially humid bathroom.
The Best Adhesives for Damage-Free Decorating
Let's break down the most popular and effective choices out there. Each one has its own personality and strengths, making them a good fit for different posters and wall surfaces.
- Poster Putty: This reusable, clay-like adhesive is a dorm room classic for a reason. It’s incredibly gentle on both your poster and the wall, which makes it perfect for temporary displays or if you like to swap your art out frequently. Just warm a small piece in your hands, stick it to the corners of your poster, and press firmly against the wall.
- Double-Sided Poster Tape: Think of this as the heavy-duty cousin of regular tape. It’s made with a special removable adhesive that’s strong enough to hold paper but won’t peel your paint off when you remove it slowly and carefully. It works best on smooth, clean surfaces.
- Washi Tape: This is where function meets fashion. Washi tape is fantastic because it acts as both the hanger and a decorative border. You can essentially frame your poster right on the wall with a fun pop of color or a cool pattern.
Pro Tip: Always, always clean your wall surface with a damp cloth and let it dry completely before sticking anything to it. Dust, grease, and grime are the biggest enemies of a secure hold and will almost guarantee your poster takes a tumble when you least expect it.
Mastering Your Technique for a Lasting Display
How you apply the adhesive is just as important as which one you pick. For instance, with poster putty, resist the urge to use one giant glob in the middle. Instead, place smaller, flattened pieces on all four corners, adding a few along the edges for bigger posters to stop them from curling.
When you're using double-sided tape, make sure you press firmly on each piece for at least 30 seconds. This gives the adhesive a chance to really bond with the wall. Rushing this step is a super common mistake that leads to peeling.
The rise of decorative tape has truly changed the game for frame-free hanging. Washi tape, which originally came from Japan, has become a global favorite thanks to its gentle, low-tack adhesive and thousands of stylish designs. Its market has absolutely exploded, with sales topping $100 million annually, all thanks to its popularity in the DIY and home decor communities.
A few well-placed prints can quickly turn into an eye-catching arrangement. If you're inspired to go bigger, check out our guide on creating a stunning photo wall display.
And for the true DIY-ers out there, you can even make your own hangable art. If you want to turn any design into a ready-to-hang piece, look into options like printable sticker paper for custom, self-adhesive items.
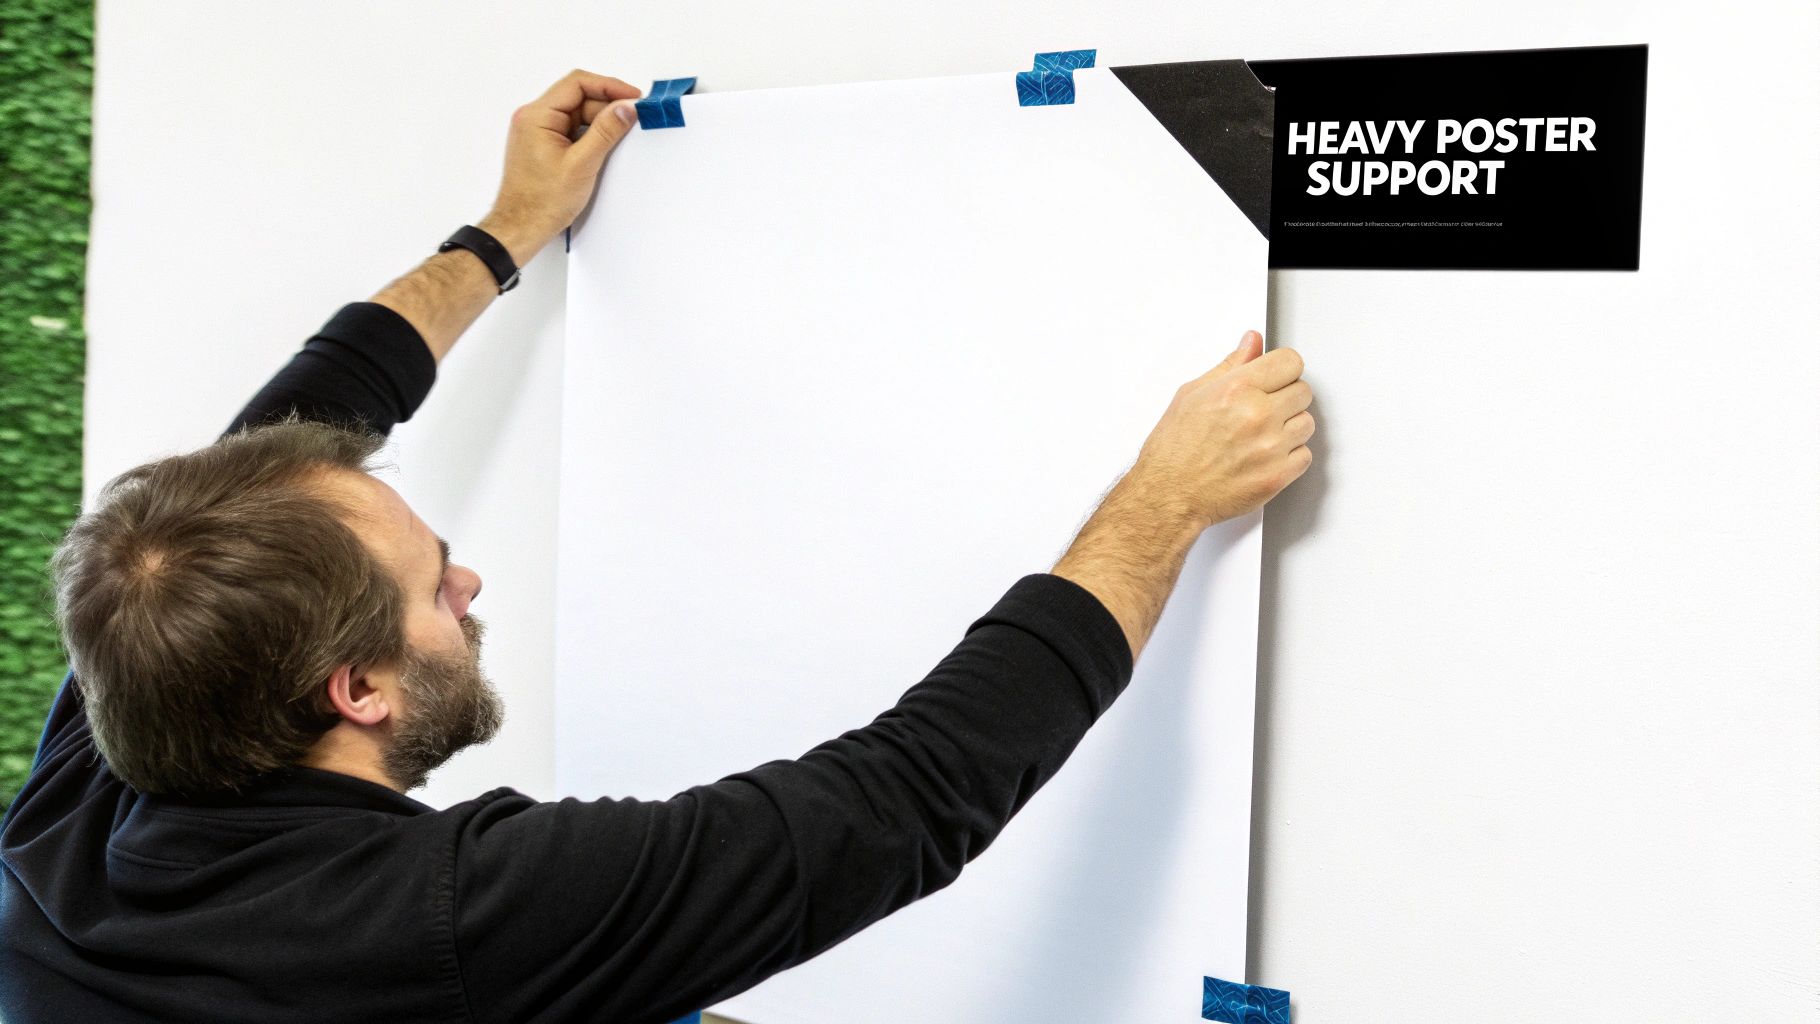
Hanging Heavier Posters with Damage-Free Strips
Got a poster with a bit more heft? Maybe it's printed on thick cardstock, laminated, or even mounted on a lightweight foam board. In these cases, your standard tape and putty just aren't going to have the muscle for the job.
This is where damage-free adhesive strips, like the ever-popular Command strips, really shine. They give you a much stronger hold, letting you skip the whole hammer-and-nails routine and keep your walls pristine. They’re the perfect middle ground for a secure display that won’t make your landlord nervous.
The concept is beautifully simple: one side grips your poster, the other grips the wall, and they lock together to handle some serious weight.
Picking the Right Strip for the Job
Not all adhesive strips are built the same, and grabbing the wrong one is a common mistake that ends with a poster on the floor. An oversized movie poster on heavy paper needs a completely different level of support than a standard little art print.
Here's what I always check:
- Weight Limit is Key: The package will always tell you the maximum weight the strips can support. My rule of thumb? Always go one level stronger than you think you need. It's better to have too much hold than not enough.
- Size Matters: Plan on using at least four strips, one in each corner. If you're hanging something big—say, over 24x36 inches—I’d add a couple of extra strips along the top and bottom edges to keep it from bowing or sagging over time.
- Know Your Walls: These strips are champs on smooth, painted drywall. But if you have highly textured walls, rough brick, or certain types of wallpaper, they can have a tough time getting a good grip. Double-check the package to see what surfaces the manufacturer recommends.
Don't forget to consider the poster material itself! Different paper types can affect how well adhesives stick. If you're diving deep into printing your own stuff, you might find our guide on the https://everone.shop/blogs/news/best-paper-for-photo-printing helpful.
The Secret to a Strong Hold (and a Clean Removal)
The real magic is in the prep work. If you rush the application, you’re just asking for trouble.
Start by giving the spot on the wall a quick wipe with an isopropyl alcohol pad. This gets rid of any dust, grime, or oils that could mess with the adhesive.
Once it’s dry, stick the strips onto the back of your poster. Press down firmly on each one for about 30 seconds—don’t be shy! Then, peel off the remaining liners, position your poster, and press it firmly against the wall for another 30-60 seconds. This pressure is what creates that rock-solid bond.
Pro Tip: When it's time for a change, never pull the strip straight away from the wall. You’ll take the paint right off with it! The trick is to pull the little tab straight down, keeping it flat against the wall. The strip will stretch and release cleanly, like magic.
There's a reason these strips have taken over. They hold a massive 60% of the wall adhesive market for picture hanging, and consumer surveys show a 95% satisfaction rate. For renters, that damage-free removal has even led to a reported 35% reduction in wall repair costs. It's a simple, effective solution that just plain works.
Exploring Stylish Clips, Hangers, and Strings
Ready to move beyond basic adhesives? There's a whole world of stylish hardware out there that can turn your poster display into a real design feature. If you want to add a more intentional, curated touch, things like clips, hangers, and strings give you both function and flair.
These methods are perfect for creating a look that feels more polished, or even a bit eclectic, depending on your vibe. The best part is that the hanging mechanism becomes part of the art itself, adding texture and character that you just can't get from a piece of tape.
Embrace the Minimalist Appeal of Magnetic Hangers
Magnetic poster hangers have been a total game-changer for achieving that clean, minimalist, gallery-like aesthetic at home. They're brilliantly simple: two pairs of wooden or metal bars with strong magnets embedded inside. You just sandwich the top and bottom of your poster between the bars, and the magnets clamp down securely without leaving a single mark.
I've used these all over my own apartment, and they're popular for a few really good reasons:
- Totally Damage-Free: The magnets grip your poster firmly without any sticky residue or pinholes, keeping it in pristine condition.
- Swap Art in Seconds: Tired of looking at the same print? Just pull the magnetic bars apart. It makes rotating your art collection incredibly easy.
- A Polished Finish: The wood or metal finish adds a touch of sophistication that instantly elevates the look of a simple poster.
It's no surprise this approach has taken off. It taps right into the growing trend of sustainable consumer behavior, which has jumped by roughly 20% since 2018. People love that these hangers are reusable and don't damage their walls or their art. With some options starting as low as $3.50, they're a seriously stylish and affordable alternative to a full-on custom frame. For more on this, check out this great guide on hanging posters without frames.
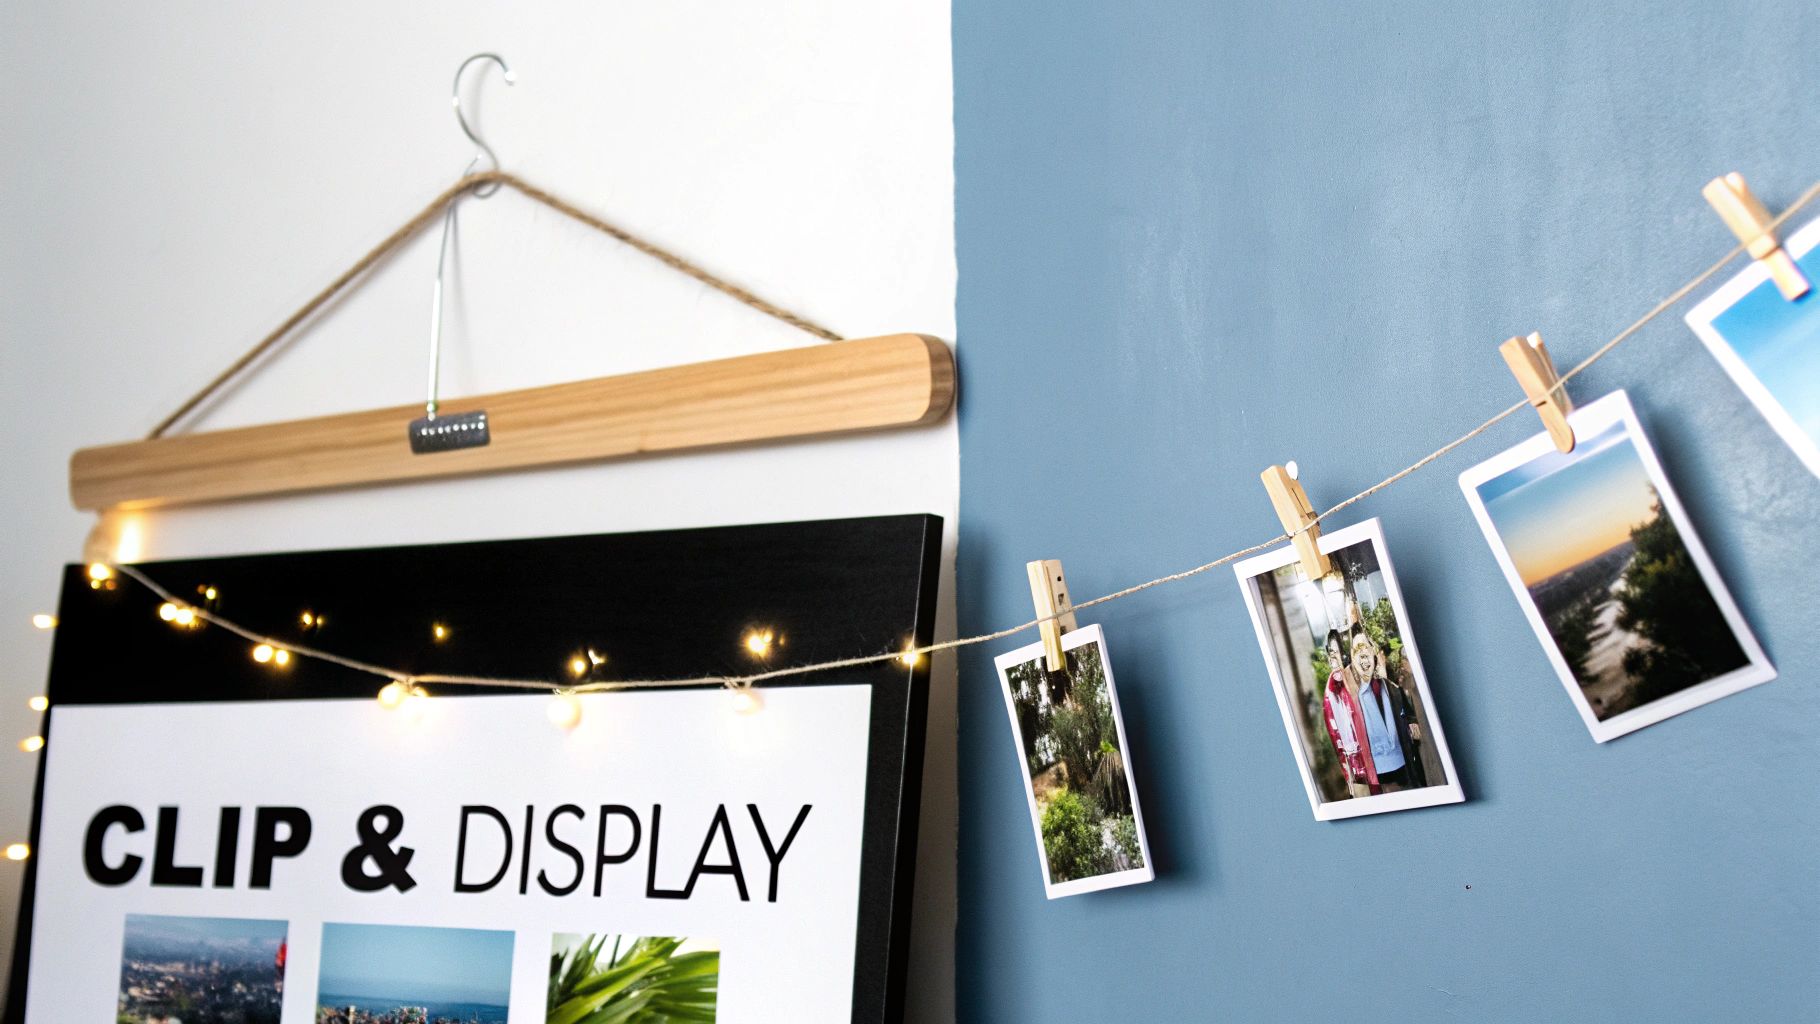
Get Creative with Clips and Strings
If you're going for a more casual, industrial, or even whimsical vibe, playing with clips and strings opens up a ton of creative possibilities. This is less about a single, static piece of art and more about creating a dynamic display that can evolve with your mood.
Think of it as your own personal mini-gallery wall that you can rearrange in just a few minutes. It's especially great for a collection of smaller prints, postcards, or photos. Once you have a general idea, you can find more inspiration on how to arrange pictures on the wall to pull the whole look together.
One of my favorite tricks is to swap out plain twine for a string of fairy lights. Clipping your posters or photos to the lights adds a warm, magical glow that’s perfect for a bedroom or cozy reading corner.
Here are a couple of popular ideas to get your own creativity flowing:
- Bulldog Clips on Nails: For an industrial-chic look, pop a few small nails or clear command hooks on the wall and hang your posters from them with metal bulldog or binder clips. The exposed hardware becomes a cool part of the aesthetic.
- Twine and Clothespins: String a line of twine or even thin wire across an empty wall and use mini clothespins to hang your prints. This creates a charming, rustic display that's super easy to update whenever you find a new piece you love.
How to Protect Your Posters and Walls
Let’s be honest, hanging a poster is the easy part. The real trick is getting it on the wall without either the poster or the wall ending up worse for wear. I've seen it happen way too many times. The key is to think a few steps ahead and match your poster's needs to the right hanging method.
Think about it this way: a glossy, lightweight band poster you snagged at a concert is pretty durable. It can probably handle a gentle adhesive like washi tape without any issues. But if you're dealing with a delicate, vintage art print on fragile paper, you need a much softer touch. Something like a magnetic hanger that clamps the paper without tearing it or leaving behind sticky gunk is a much safer bet.
A Little Prep Goes a Long Way
Before you even touch that roll of tape, a bit of prep work will save you a world of headaches later. This isn't just about making the adhesive stick better; it’s about preventing damage when it's time for a change.
First, grab a clean, damp cloth and give the spot on the wall a quick wipe. You're just getting rid of any dust or grime that could mess with the adhesive. Let it dry completely. Trust me, this simple move can be the difference between a poster that stays up for years and one that dramatically peels off in the middle of the night.
Now for the poster itself. If it’s been rolled up in a tube, those curling edges can be a real pain. The fix is easy: just gently roll it the opposite way for a few minutes. If it’s being extra stubborn, lay it on a clean, flat surface, cover it with a towel or cloth, and weigh down the corners with some heavy books for a day or so. Problem solved.
Common Mistakes I See All the Time
Knowing what not to do is just as important as knowing the right steps. You don't have to learn these lessons the hard way like so many of us have.
Here are a few classic blunders to steer clear of:
- Wrong adhesive for the wall. Trying to stick poster putty on a heavily textured or bumpy wall is just asking for trouble. The putty can't get a good grip on the uneven surface, and your poster will eventually fall.
- Ripping strips off the wall. When you're ready to take down a poster hung with adhesive strips (like Command Strips), always pull the tab straight down along the wall. Pulling it out, away from the wall, is a surefire way to rip a nice chunk of paint and drywall right off with it.
- Forgetting about humidity. Hanging a paper poster in a steamy bathroom or a damp basement is a recipe for disaster. The paper will soak up moisture from the air, causing it to warp and ripple. For humid spots, think about using laminated posters or a method like magnetic hangers that lets air circulate behind the art.
The single most important piece of advice I can give is this: never, ever rush the removal process. Whether you're dealing with putty, tape, or an adhesive strip, slow and steady is the only way to go. It’s what saves you from spending your weekend patching up the wall.
By taking just a few of these simple precautions, you can hang your posters with total confidence. Your art will look fantastic, and your walls will stay in perfect shape for whatever you decide to hang next.
Got Questions? We've Got Answers
You've got the ideas, you've seen the methods, but a few nagging questions might still be bouncing around in your head. That's completely normal. Let's tackle some of the most common head-scratchers people run into when hanging posters without frames. Getting these little details right makes all the difference.
What's the Best Way to Hang Posters Without Wrecking My Painted Walls?
If you're worried about your paint (and your security deposit), your safest bet is to use adhesives specifically designed for the job. I always point people towards things like Command Poster Strips. They're made to peel off without a fight and won't take a chunk of your wall with them.
Another great option, especially for a bit of decorative flair, is good-quality washi tape. It has a gentle stickiness that’s usually safe for well-cured paint. If you want to skip adhesives altogether, magnetic poster hangers are a fantastic and stylish choice. They just need one tiny nail or a removable hook to hang from.
Pro Tip: Before you commit, always, always test your chosen adhesive on a small, hidden spot. Behind a bookshelf or a door is perfect. This is a non-negotiable step, especially if your paint is a bit older or your walls have a texture.
Help! My Poster Keeps Curling Up at the Edges.
Ah, the classic poster curl. It’s the tell-tale sign of a poster that just came out of a shipping tube. Don't worry, it's an easy fix.
The simplest trick is to unroll it on a clean floor or a big table. Lay a clean sheet over it to keep the print safe, then weigh it down with some heavy books on the corners and in the middle. Let it chill out like that for 24 to 48 hours—patience is key here!
In a pinch? You can try gently rolling the poster the opposite way of the curl for a few minutes. When you do hang it, be generous with your tape or tacks. Hitting all four corners plus a few extra points along the sides will help keep it flat and flush against the wall.
Can I Use These Methods for Fabric or Canvas Posters?
You absolutely can! Many of these frameless tricks are perfect for textiles. Magnetic poster hangers, in particular, look amazing with fabric or thin canvas. They clamp onto the top and bottom, letting the material hang beautifully flat without putting any holes in it.
For a more industrial or eclectic vibe, try using bulldog clips or binder clips. Just clip them on and hang them from small nails or hooks.
Here's another cool idea for a more polished, tapestry-like feel:
- First, sew a small pocket along the top edge of your fabric poster.
- Next, just slide a simple wooden dowel through it.
- Finally, tie a piece of string or cord to the ends of the dowel and hang it up!
This gives your fabric art a really intentional, finished look without the cost or weight of a full-on frame.
Ready to bring your own photos to life? At everone prints, we turn your favorite memories into gorgeous, high-quality posters and prints that are ready to hang. Start designing your personalized art today!